This tutorial is showing how we can add vertex in Blender. In below steps, we will go through how to add vertex to edge in Edit Mode. in other words, if we select 2 vertices, and use Subdivide, we can add vertex between the 2 vertices, which is adding a single vertex in the middle of edge. Hope this helps.
Blender How to add vertex
1. Select an object, and then go to Edit Mode.
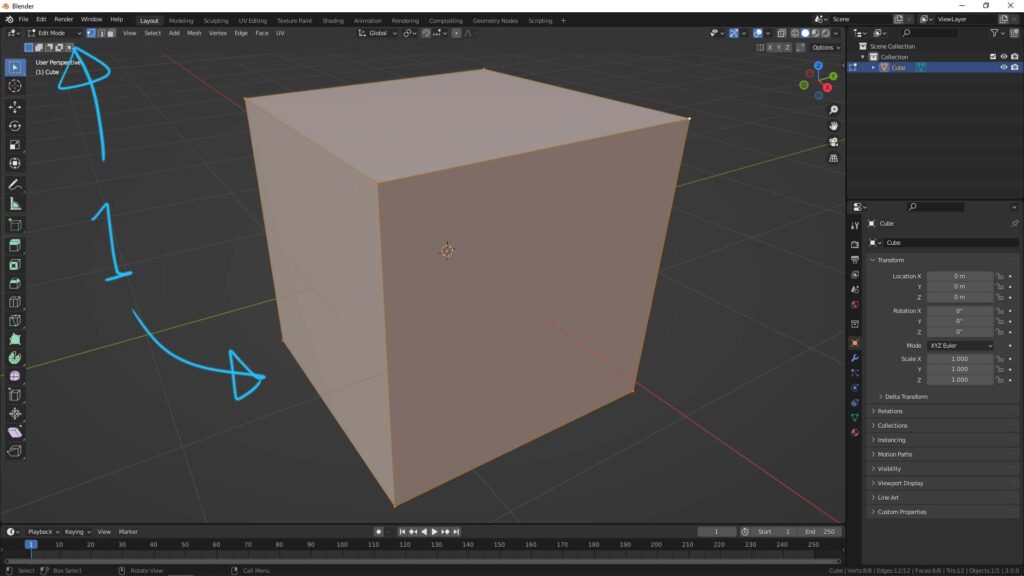
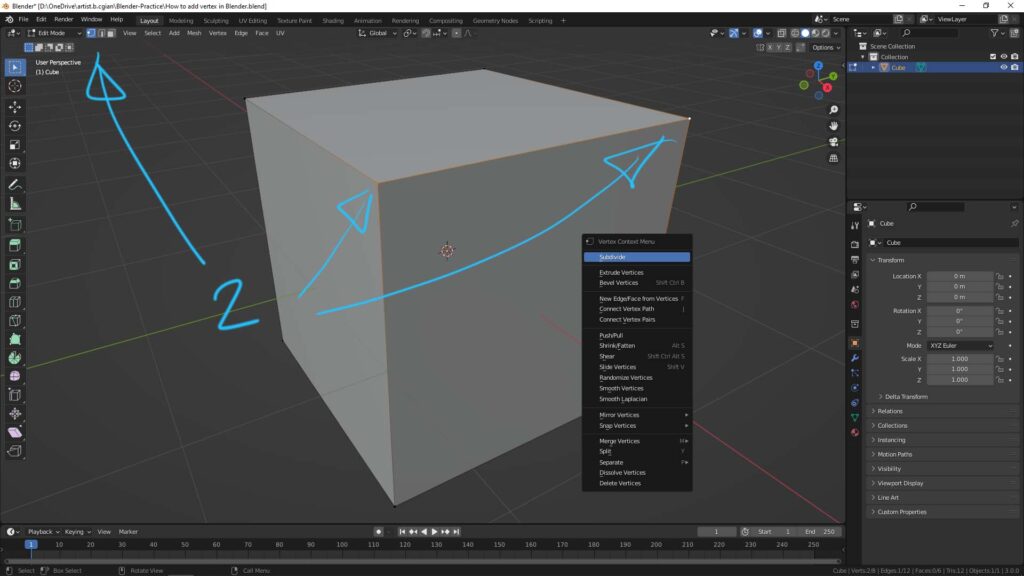
2. In Edit Mode, select vertex. The 2 vertices at the top front corner were selected as per example. And then we can right click to open Vertex Context Menu, and select Subdivide.

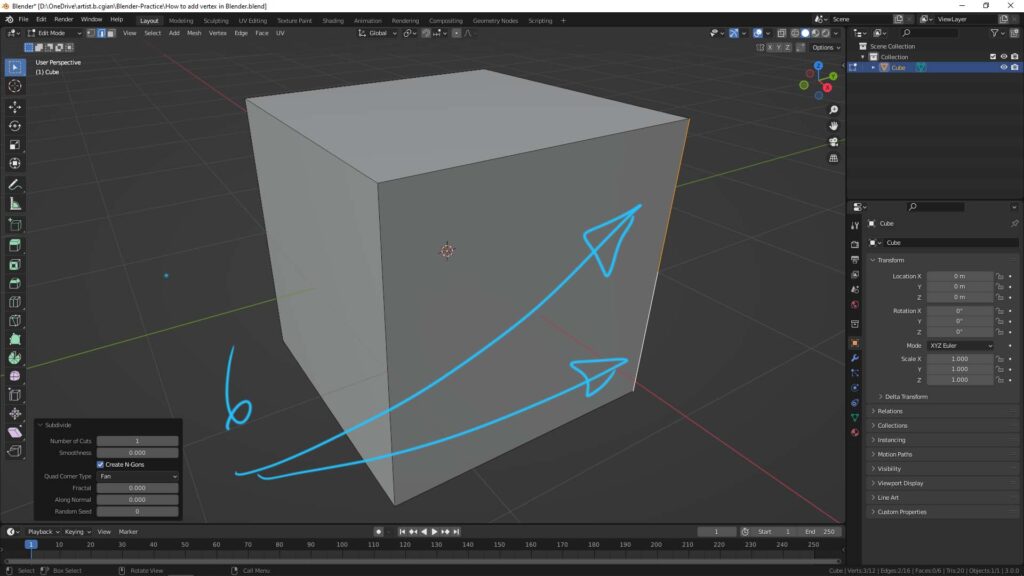
3. The edge is then subdivided, and a single vertex is added at the middle of edge. We can open the Subdivide Menu to adjust further more.
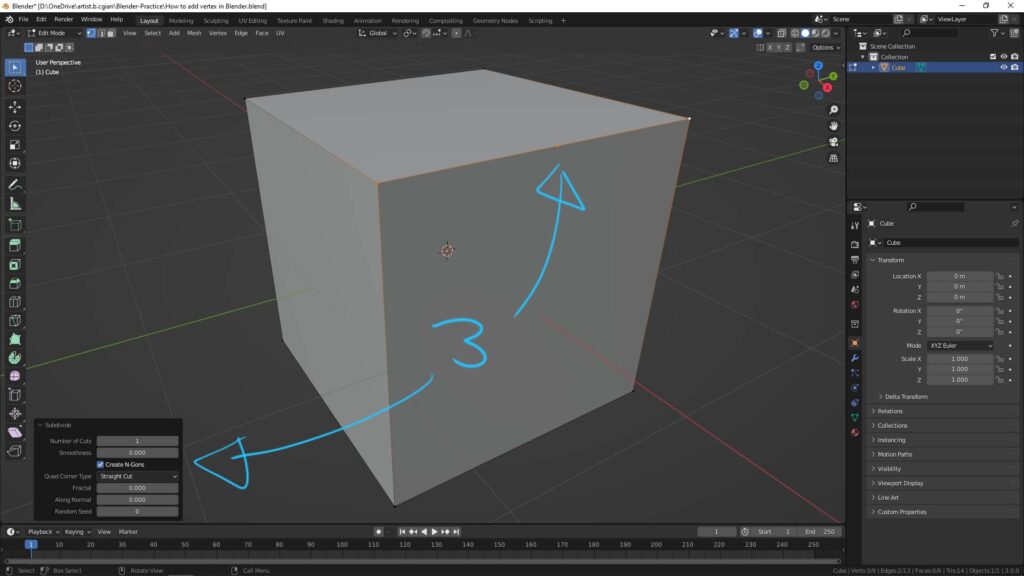

4. For example, we can add more vertices, if we increase the Number of Cuts.
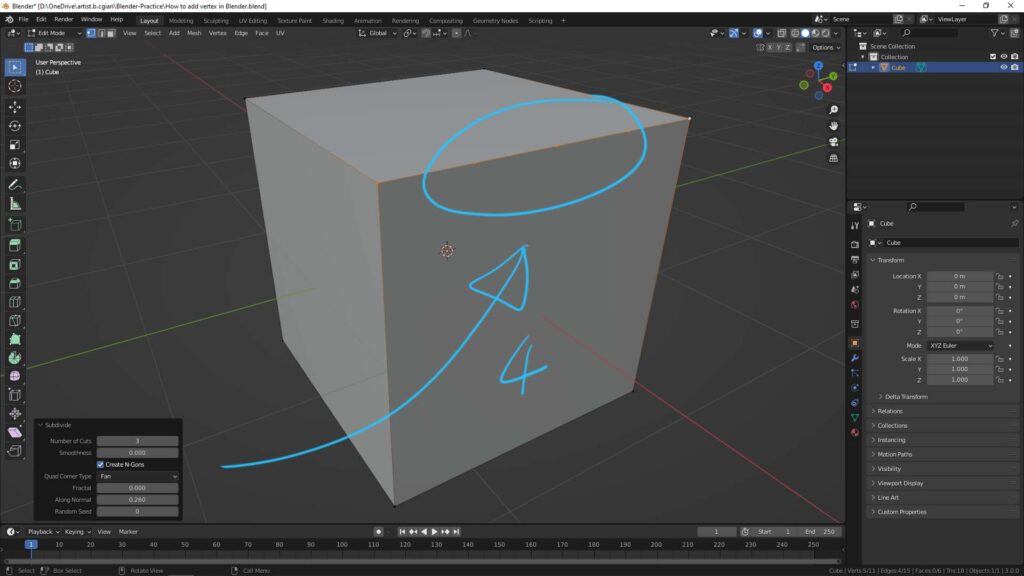

5. The alternative way that gives the same result. We can select the edge, and right click to open Edge Context Menu, then choose Subdivide.
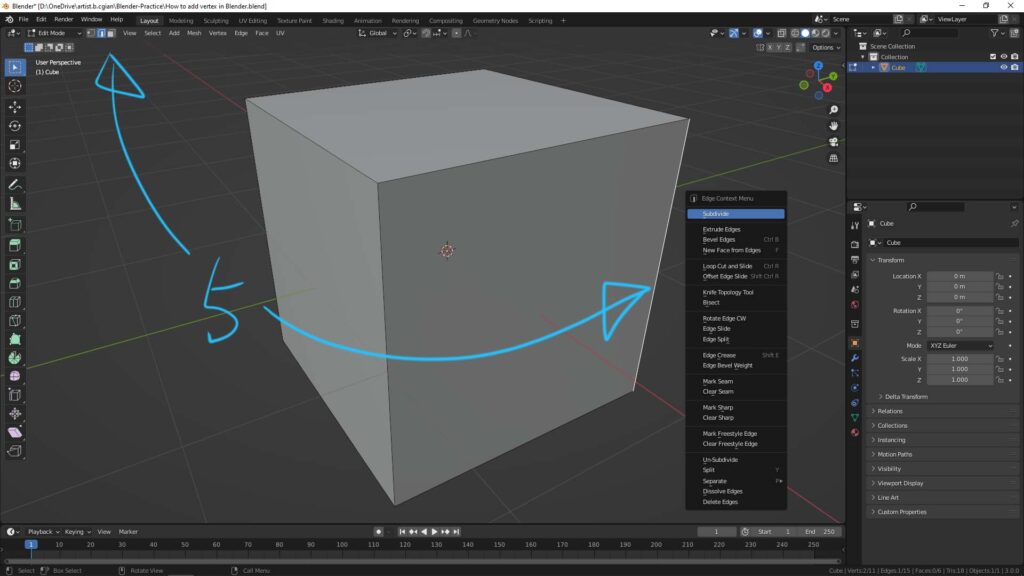

6. Then the edge is subdivided into 2 edges, and a single vertex is added in the middle of edge. If we now switch to vertex selection, we can see the middle vertex is added.

Hope this helps. More Blender Tutorial, Tips and Trick are available here.
#b3d #blender #cgian
Continues Reading:
How to move 3D cursor to vertex in Blender
How to Merge Vertices in Blender
Blender how to add vertex at center in a face
Blender How to turn vertices to circle
Tips and Tricks
from artist.B
Feel free to share by using below button

