Blender Loop Cut is to split a face into two or multiple faces by adding edges. This is useful tool to change 3D object shape in 3D modeling. In Blender, we can go to Edit Mode to add Loop Cut after selecting a 3D object. Below steps are showings how we can add loop cut into a default cube with shortcuts. Hope this helps.
How to add Loop Cut in Blender
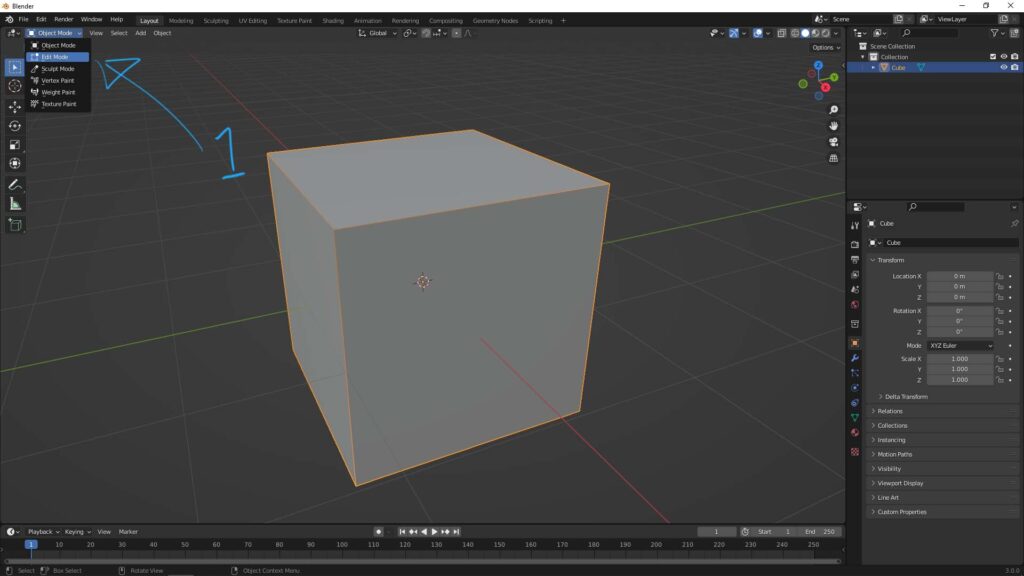
1. Select an object and go to Edit Mode, we can use shortcut Tab to go to Edit Mode after selecting an object.
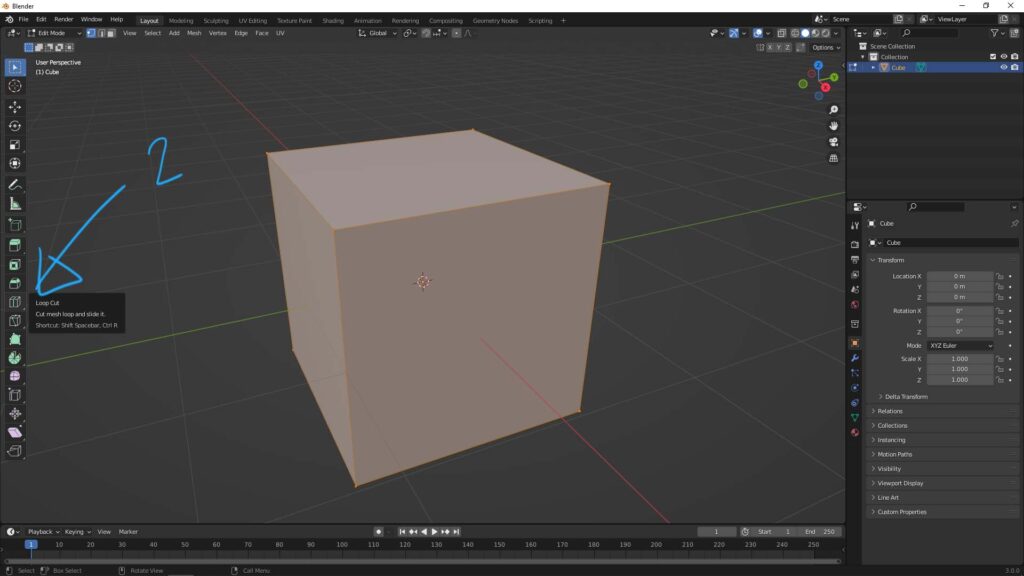
2. In the tool bar on the left, we can click Loop Cut Icon or we can use shortcut Ctrl R directly
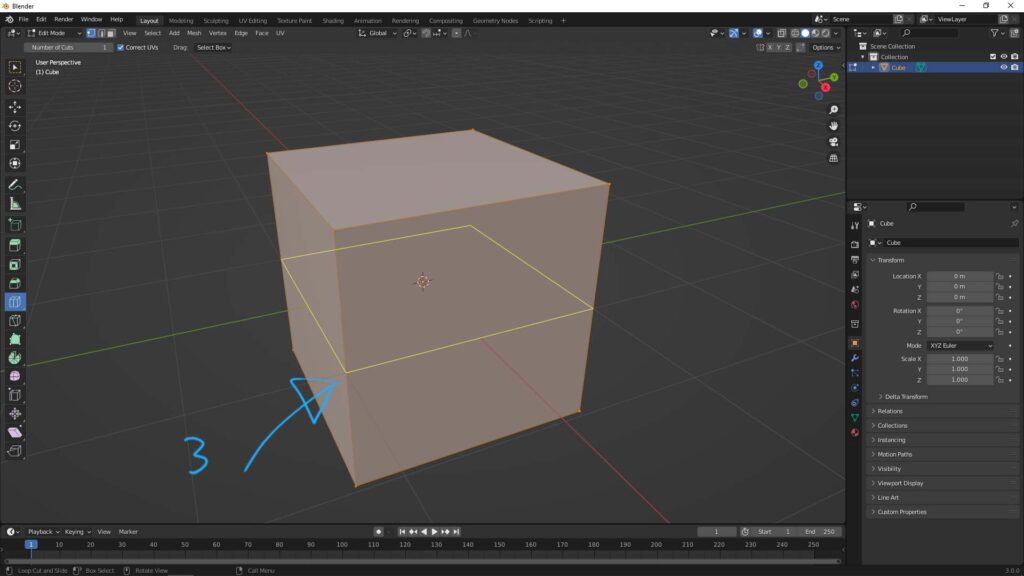
3. And then , move the cursor near an edge, it will show a loop cut.
4. Then, we can click and drag to move the loop cut position where you preferred.
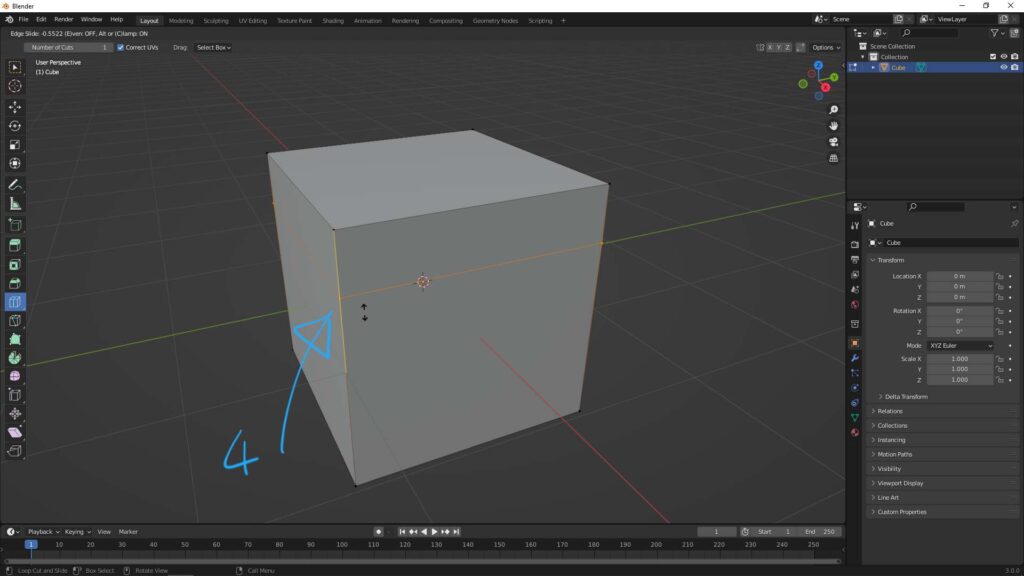
5. If not click and drag, we can click the edge once, and open the menu on the bottom left
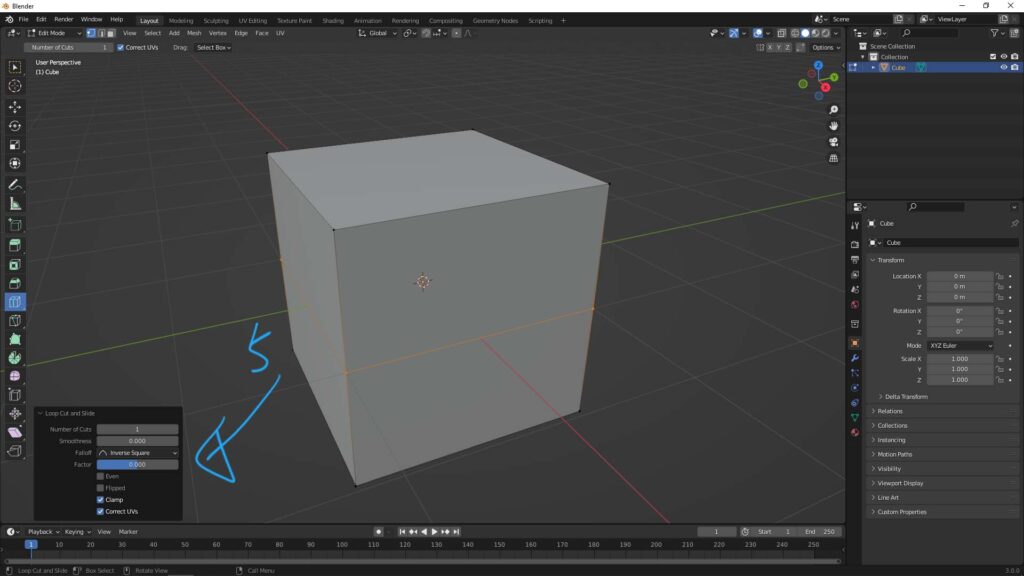
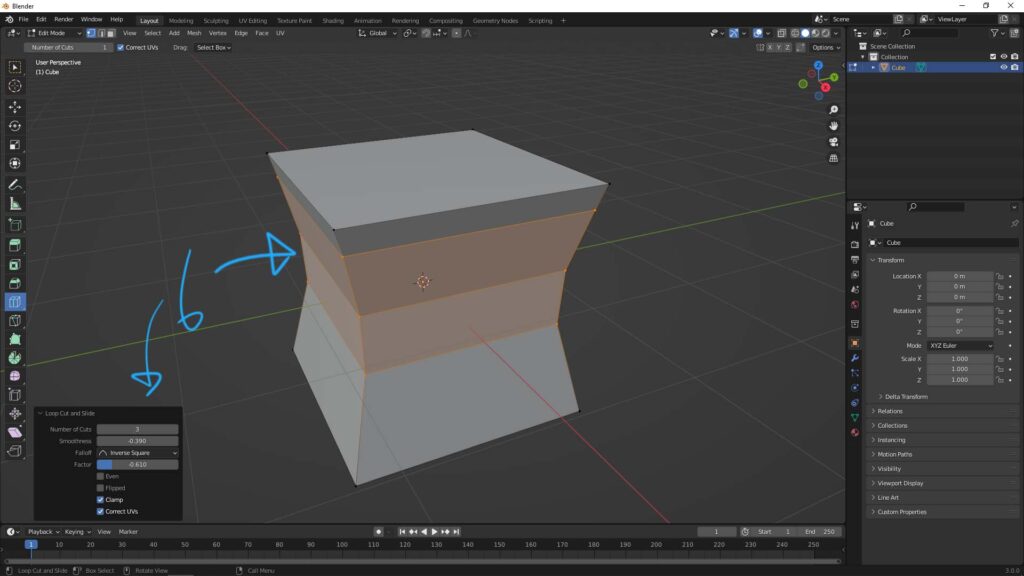
6. There are options to show how loop cuts be added. We can add number of loop cuts, and adjust their shape.
Hope this helps. More Blender Tutorial, Tips and Trick are available here.
#b3d #blender #cgian
Continues Reading:
How to Subdivide in Blender
How to select back Vertices, Edges, Faces behind object in Blender
Blender Bridge Tool – To Connect 2 Faces or Edges
Blender How to Mirror
Tips and Tricks
from artist.B
Feel free to share by using below button
