Blender Noise Texture Node is useful procedural texture node for making material in Shader Editor. We can use this noise texture node to make material rough, or make material with brushed texture. Below steps show how we can apply noise texture node into an object. Furthermore at the bottom part, we can watch video to know how to make rough plastic and brushed metal by applying noise texture node. Hope this helps.
How to apply Noise Texture Node in Blender
1. To preview the material when editing, we can switch to Material Preview.
2. Switch to Shader Editor for editing the material
3. Add Material, a Principled BSDF Node is added.
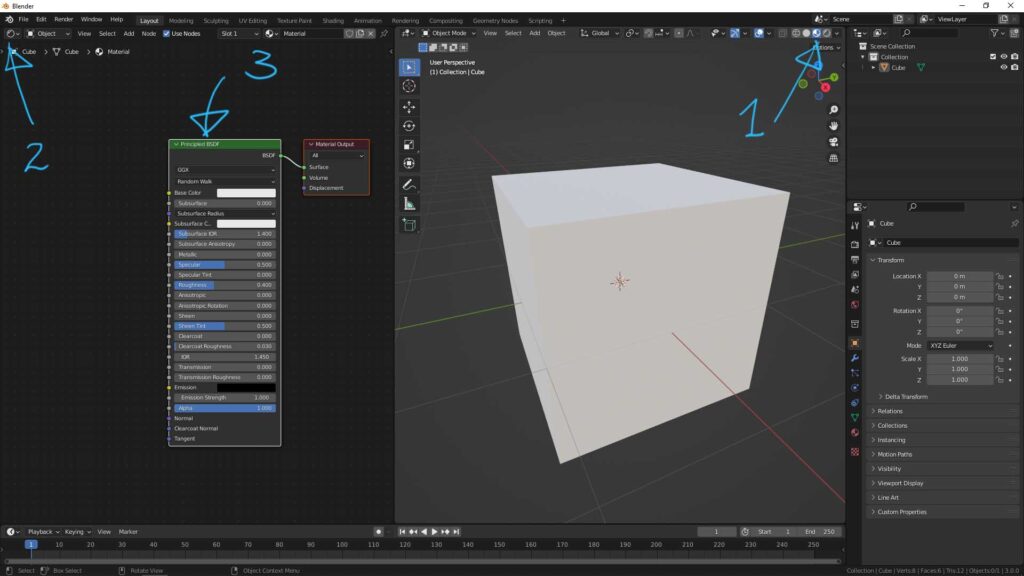
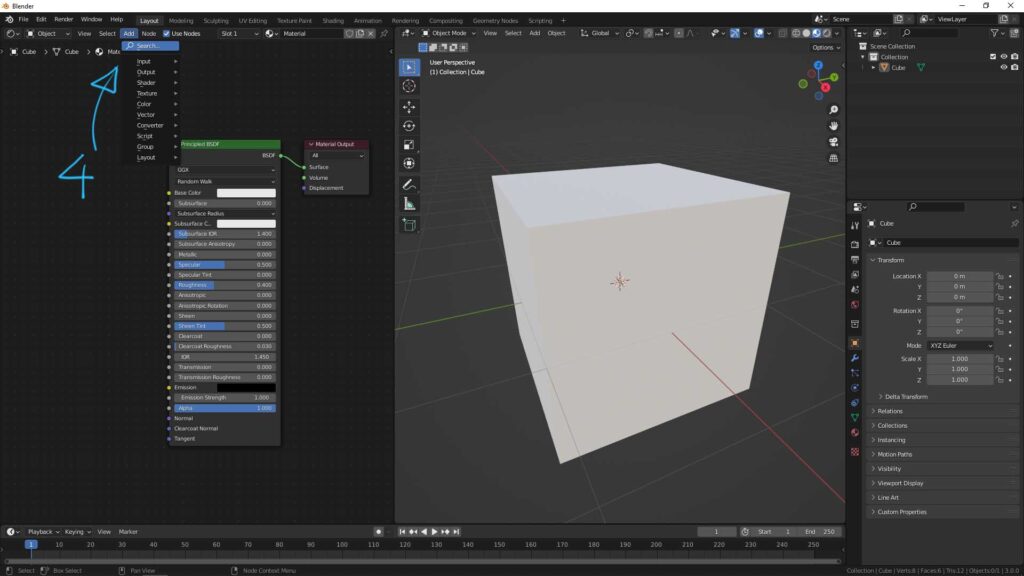
4. Go to Add > Search ,
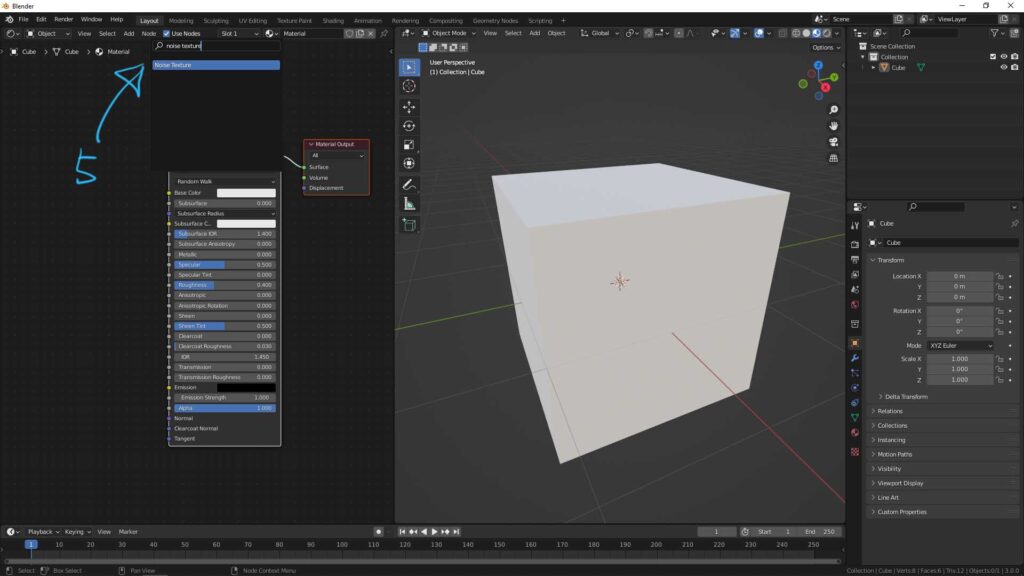
5. Search ” Nose Texture” ,
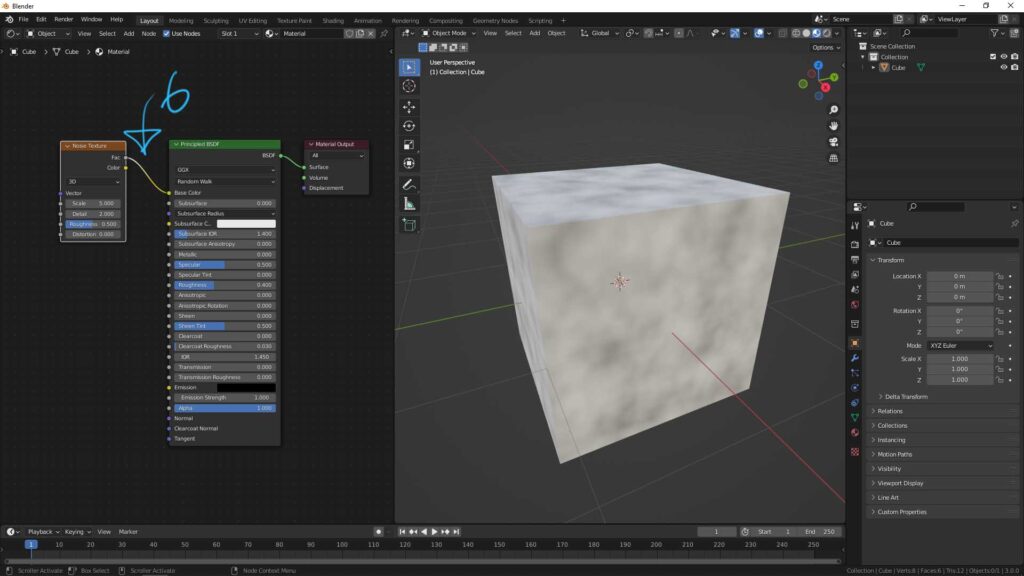
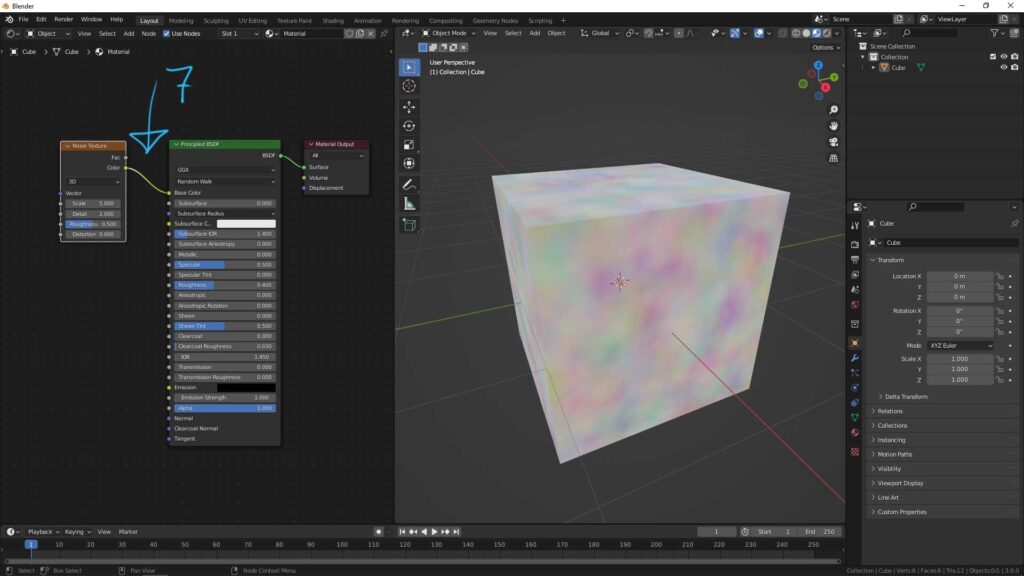
6. Noise texture node is added, and we can connect “Fac” to “Base Color” as per screenshot, then, the object color is showed with noise texture.
7. If we connect “color” to “Base color”, the color noise is applied to the object.
Furthermore, below 2 videos show the examples how we can apply noise texture node into material to make Rough Plastic and Brushed Metal. Watch the video to understand how we can make them.
Watch on YouTube,
Hope this helps. More Blender Tutorial, Tips and Tricks are available here.
Have fun with CGI, to make it simple.
#cgian #b3d #blender
Continuous Reading:
Blender Shortcut for adding Mapping Node and Texture Coordinate Node
Blender Viewer Node with Shortcut
How to add image texture mapping in Blender
Feel free to share with your friend.
by [email protected]
