Quick tips for Blender basics, this shows how to use shortcut to add mapping node and texture coordinate node in Blender. Below are the step by step, we can add the 2 nodes by using shortcut Ctrl + T with addon Node Wrangle, to speed up our work process. Hope this helps. More Blender Tutorial, Tips and Tricks are available here.
Blender Shortcut for Mapping Node and Texture Coordinate Node
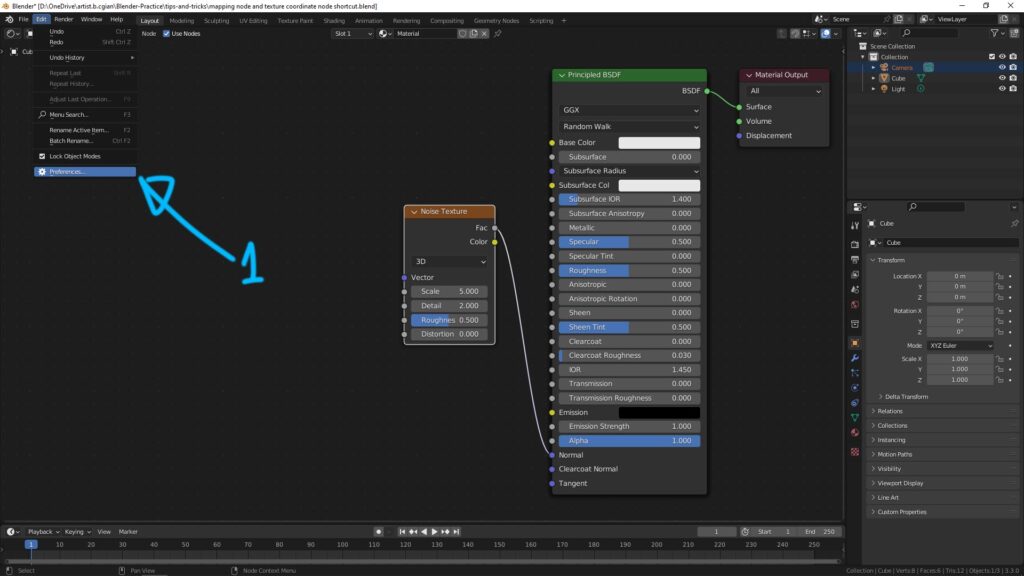
1. To use this shortcut, firstly, we need to activate the build-it addon Node Wrangle. To activate Addon, as below screenshot shown, we can go to Edit > Preferences

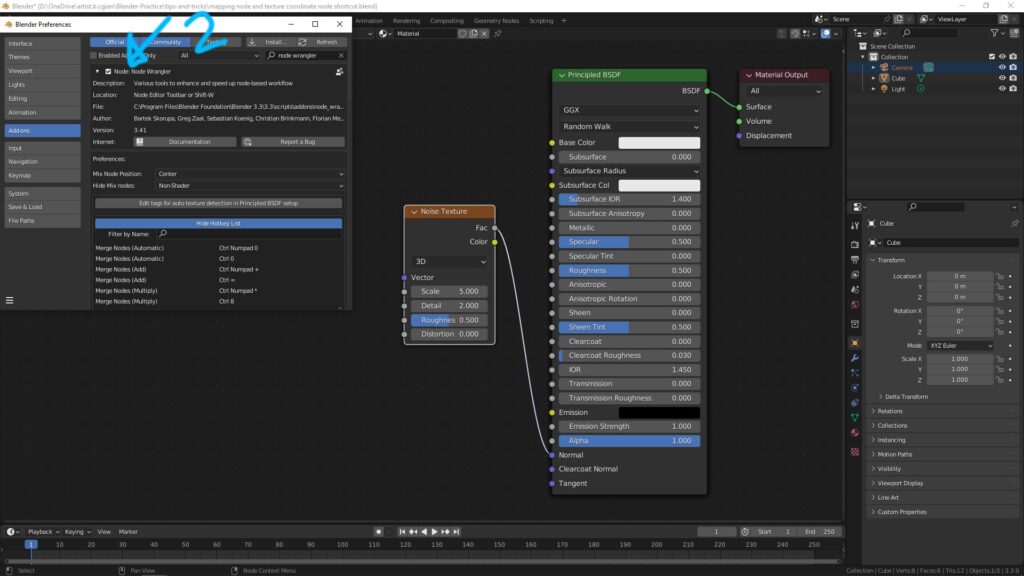
2. In the Preferences Window, we can search Node Wrangle in the top right corner, and then check the box of Node: Node Wrangle

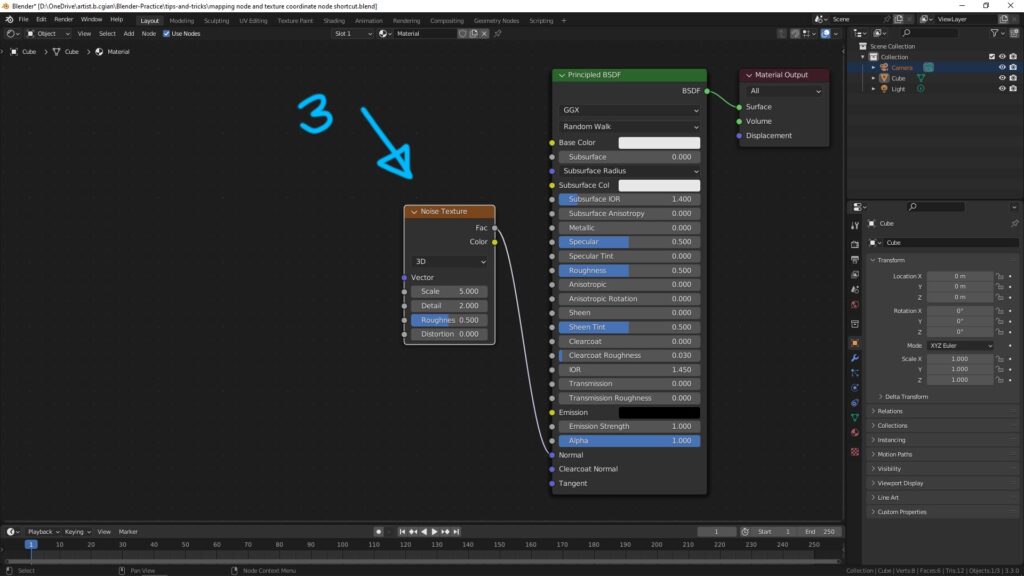
3. Go back to Shader Editor, make sure that the texture node is selected ; Noise Texture is selected for this example.

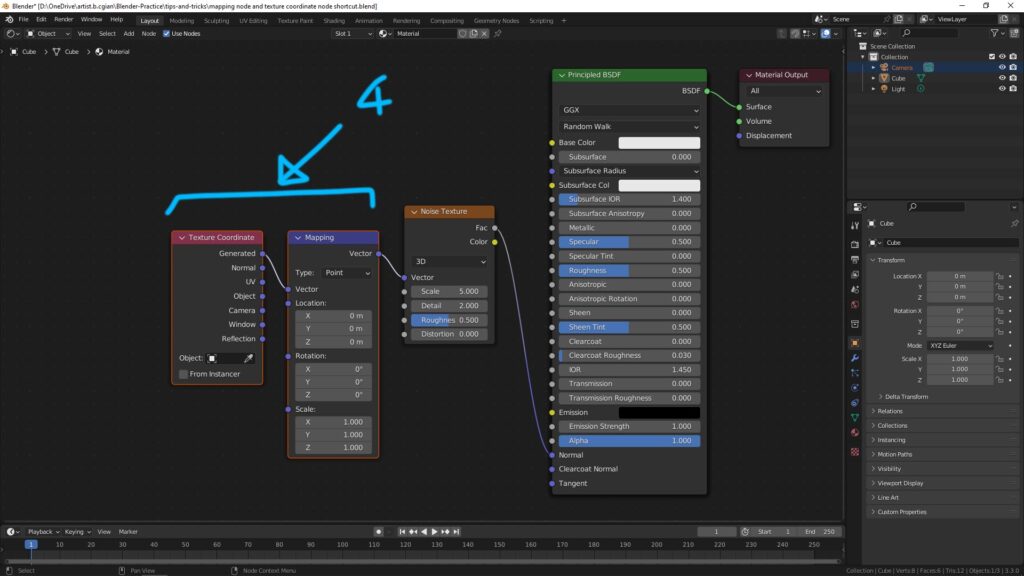
4. Press shortcut Ctrl + T , then mapping node and texture coordinate node are added and linked together.

Hope this helps. More Blender Tutorial, Tips and Tricks are available here.
Have fun with CGI, to make it simple.
#cgian #aritstB #b3d #blender
Continues Reading :
How to add text in Blender
How to Focus on Object , Blender Basics
Blender apply material to all selected objects
Blender straight node lines
Welcome to share with your friend.
by [email protected]
