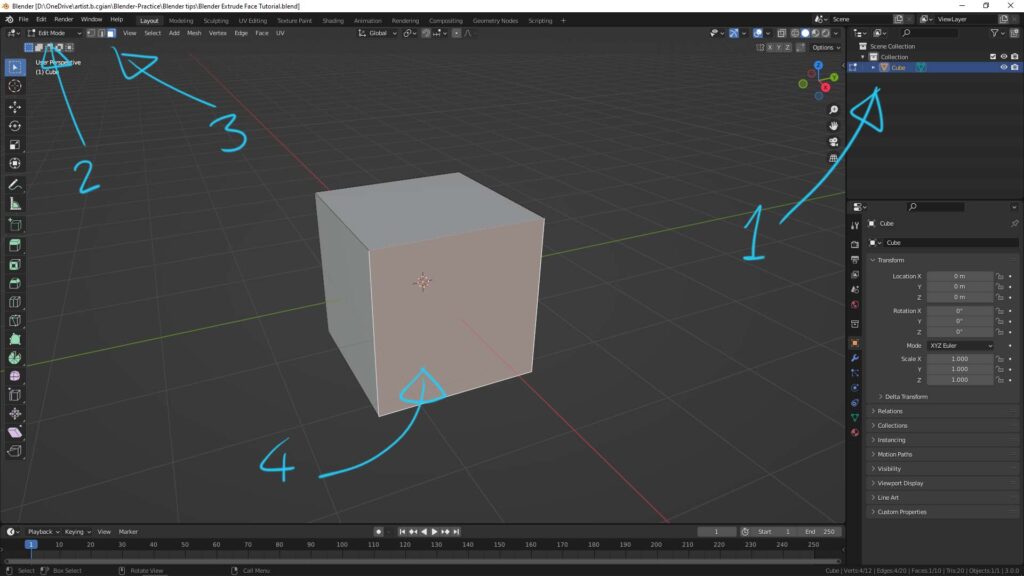
Extrude Face is the most used feature when we are making and editing a 3D model. In Blender, we can go to edit mode to extrude face and modify the 3D object. There are the options to extrude face ; to Extrude Face Along Normals ; to Extrude Individual Faces. Below is the step by step that shows how to extrude face from a cube in Blender. Hope this helps.
Blender Extrude Face step by step
1. Select the 3D object
2. Switch to Edit Mode
3. Choose “Face Select”
4. Select face or multiple faces

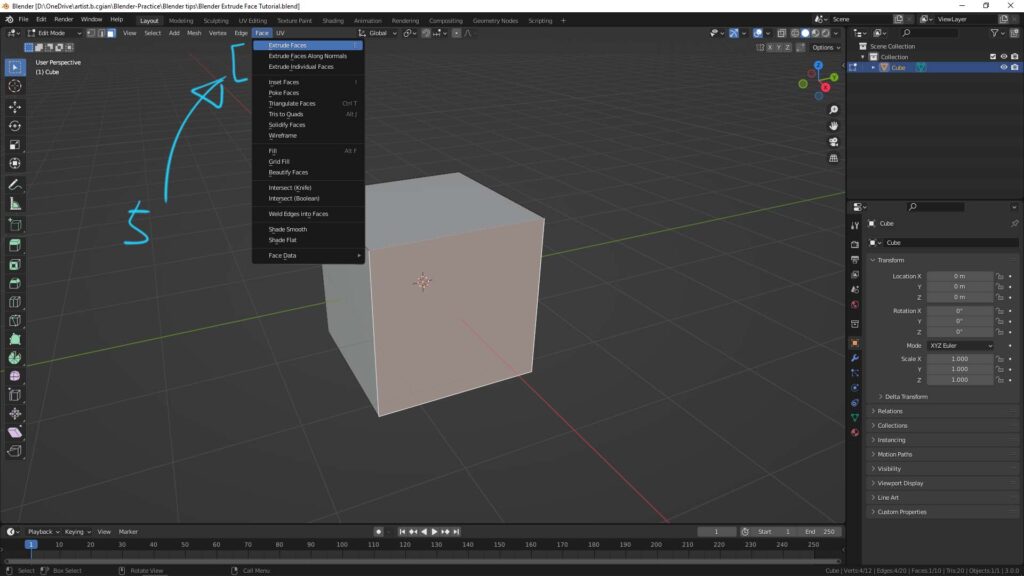
5. We can use Extrude Shortcut E, or we can go to Face > Extrude Face. In addition, we can have options to Extrude Face Along Normals or Extrude Individual Faces.

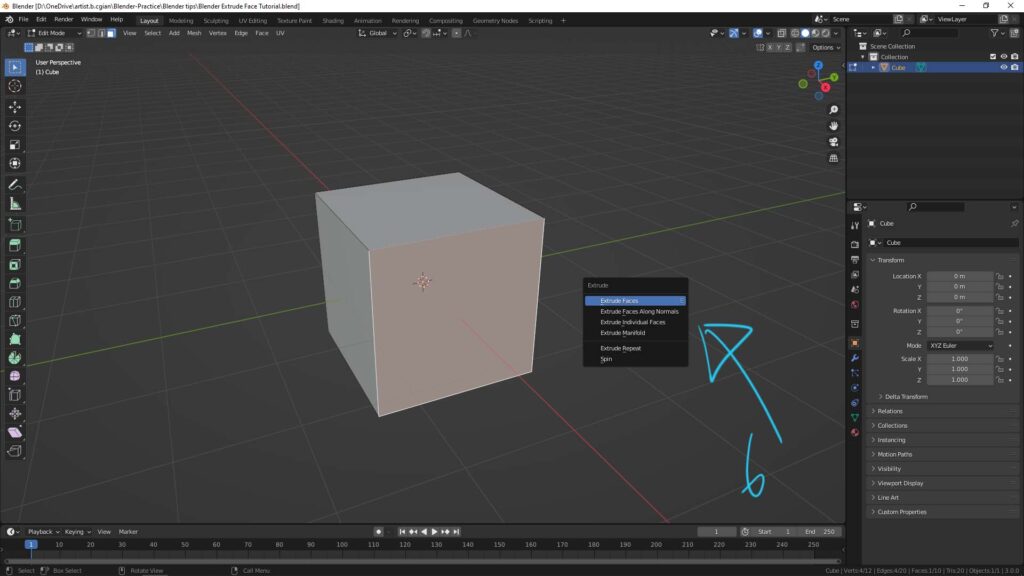
6. Alternative way is use shortcut Alt E, to open Extrude Menu shown as below screenshot.

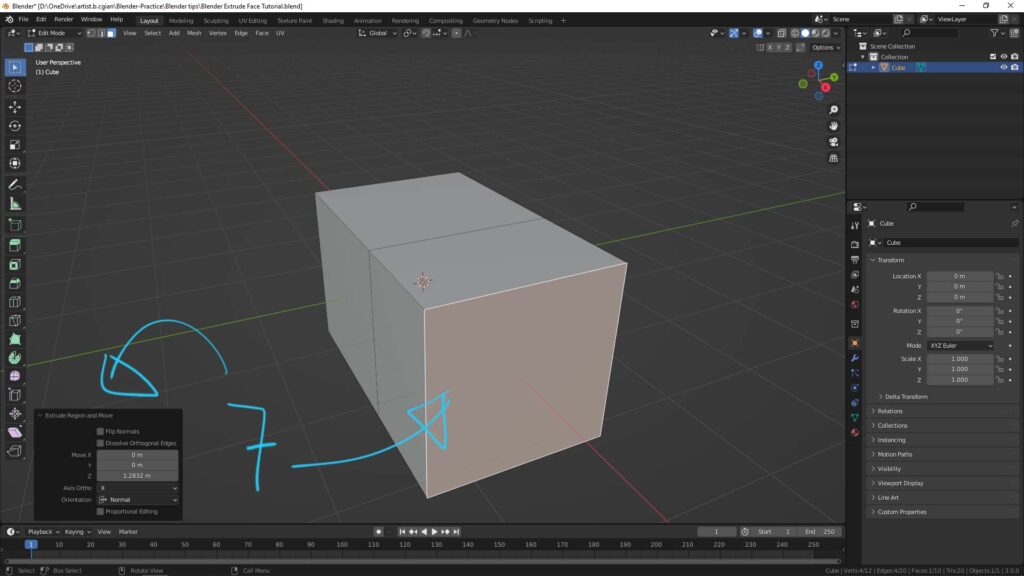
7. After Extruding face, we can have options to change the setting in the Extrude Menu at bottom right corner.

Hope this helps. More Blender Tutorial, Tips and Tricks are available here.
Have fun with CGI, to make it simple.
#cgian #aritstB #b3d #blender
Continuous Reading:
Blender Bridge Tool – To Connect 2 Faces or Edges
Blender Add Vertex
How to fill quad face to hole
Feel free to share with your friend.
by [email protected]
