In 3D, normal map is a useful image for indicating the depth when making texture. We always use normal map or bump map or displacement map to make the texture more realistic. Below is a quick 3D tool in Adobe Photoshop, the steps to show how to make a normal map by few clicks. It is still working for Photoshop 2022. Hope this helps. More Photoshop Tips and Tricks, and Tutorial are available here.
How to make normal map in Photoshop
1. Open an texture image in Photoshop
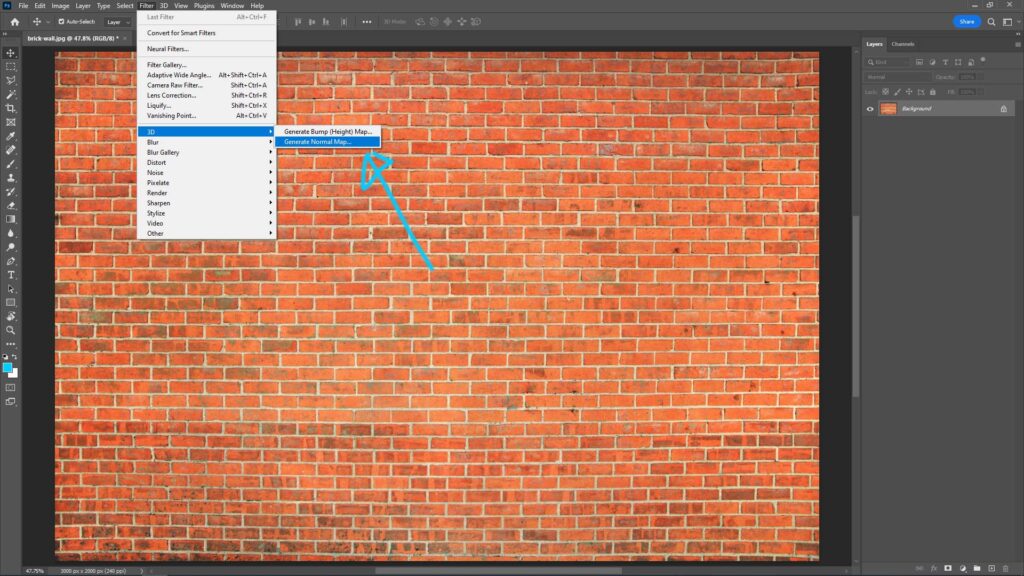
2. Go to Filter > 3D > Generate Normal Map …

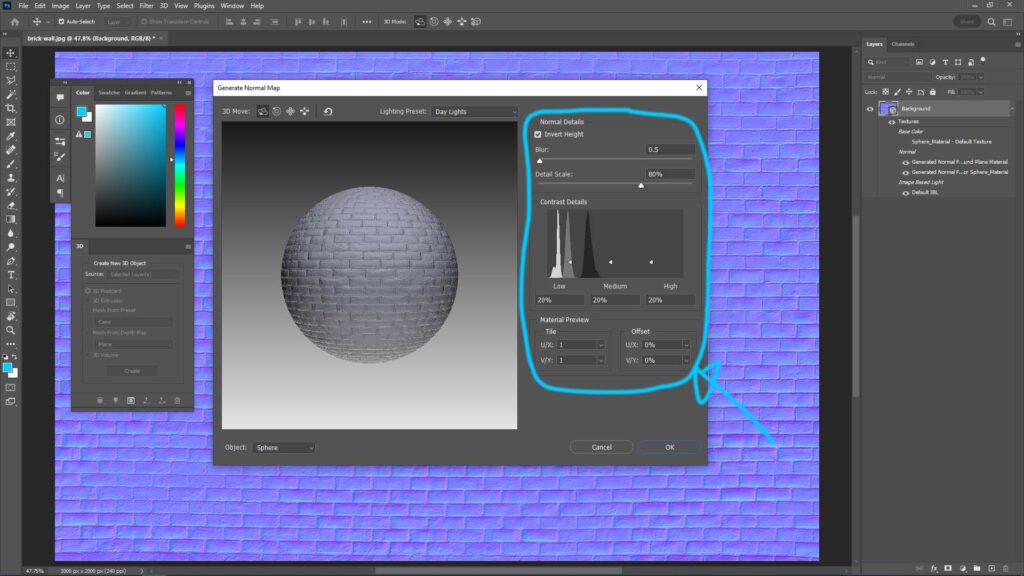
3. The “Generate Normal Map” window will be popup, and we can adjust the setting on the right panel in the window.

4. Click OK, after adjusting the setting.
5. Remember to save as a new image file.
Hope this helps. More Photoshop Tips and Tricks, and Tutorial are available here.
Continues Reading :
How to add Roughness Map and Normal Map in Blender
Way to export UV map From Maya to Photoshop
Generative Fill Tutorial in Photoshop Beta
Photoshop enlarge image without losing quality using Preserve Details 2.0
Welcome to share with your friend.
by [email protected]
