Blender basics, the steps to show how to add textures to a model in Blender. The quick way to add texture to 3D object in Blender, we can add image texture, that image texture will link to an image file like as jpg, png or others. Below is a quick preview how to add texture to 3D object, hope this helps.
How to add textures to a model in Blender
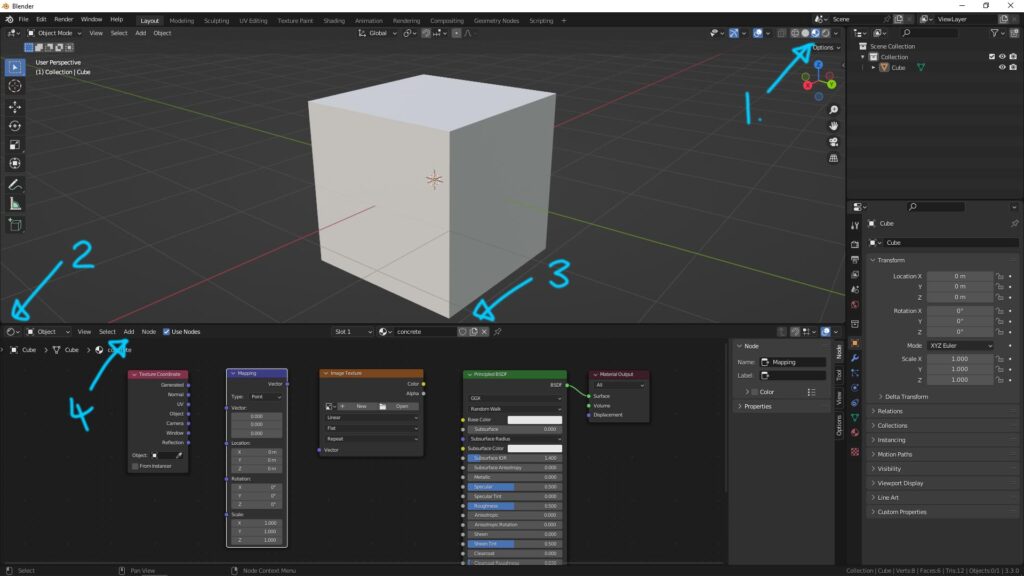
1. Firstly, We can switch to Viewport Shading – Material Preview, that is for previewing the material including color, texture on the object.
2. Switch to Shader Editor, that is work space for editing the shader or material.
3. Add a new Material. Make sure that we selected an object before clicking the icon “Add a New Material”
4. Next to add the node by using drop down menu, or we can use shortcut Shift A to add node. To add texture to 3D object in Blender, we add Image Texture node, Mapping node, and Texture Coordinate node.
– Image Texture node is for linking the image that contain the texture like as concrete, wood, stone, or others.
– Mapping node is for adjusting the size, orientation of image texture.
– Texture Coordinate node is for defining the way how the 2D image projects onto 3D object.

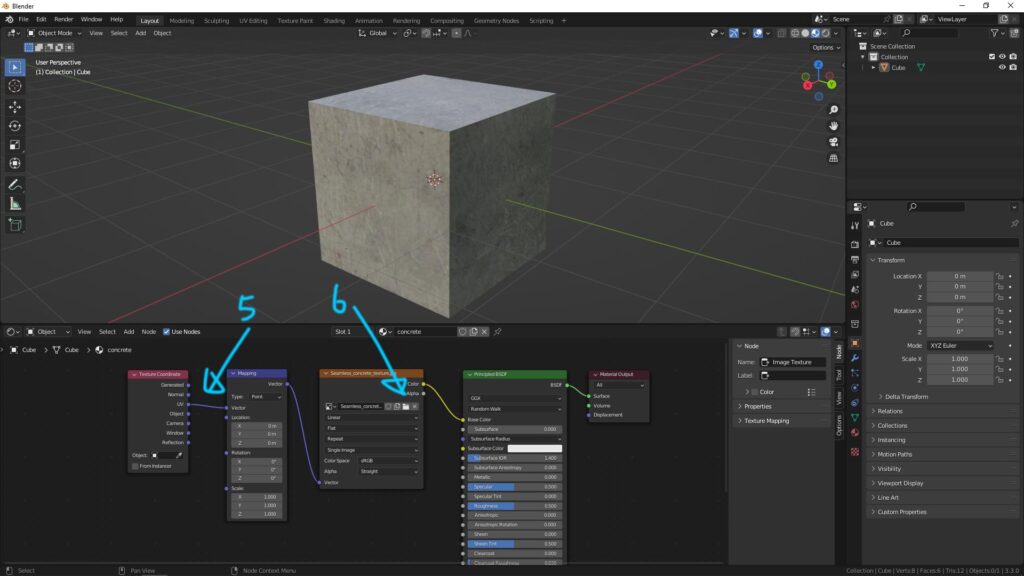
5. Connect the nodes as per below screenshot.
6. In Image Texture node, click the Folder icon, and select an image file, finally the 2D image texture will be show on 3D object.

This is basic step for adding texture image into base color. In advance, we can add specular map, roughness map, bump map, normal map, displacement map, etc. to make the texture on 3D object more realistic.
Hope this helps. More Blender Tutorial, Tips and Tricks are available here.
Continues Reading :
Blender export FBX with texture
Blender Wood Texture Material Shader | Procedural Textures
How to make Hard Surface Modeling and Rendering in Blender 3D – 3 Steps for beginners
Welcome to share with your friend.
by [email protected]
