In Blender, Subdivide is a useful tool to add mesh for editing the shape of 3D object. If we want to subdivide a plane or face or 3D object, one of the ways is going to Edit Mode, and make Subdivide. Below are the steps to make Subdivide Plane , Face or Cube, by using shortcut in Blender. Hope this helps. More Blender Tutorial, Tips and Trick are available here.
How to subdivide a plane, face and cube in Blender
Blender Subdivide Plane
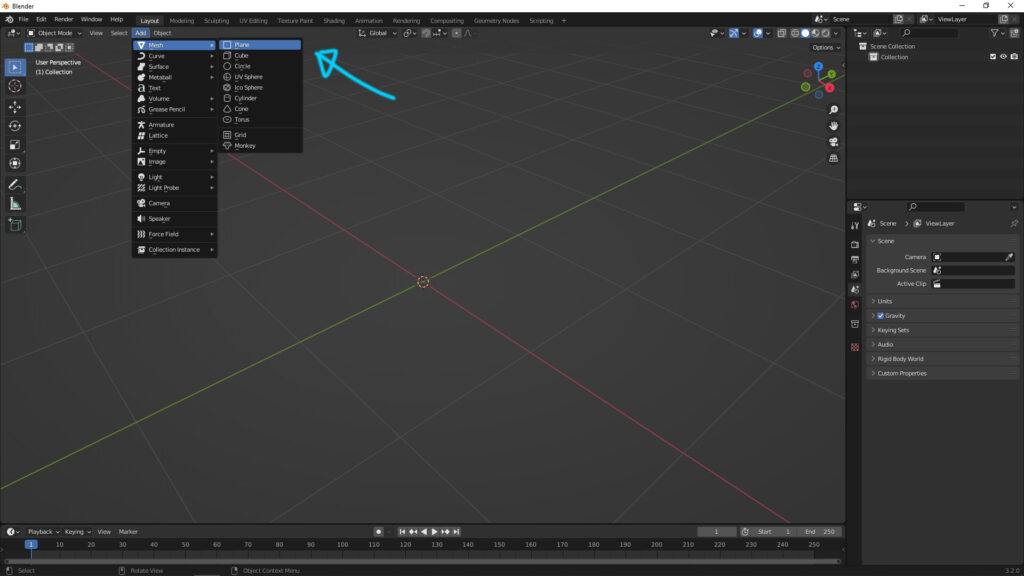
1. In Object Mode, add a plane
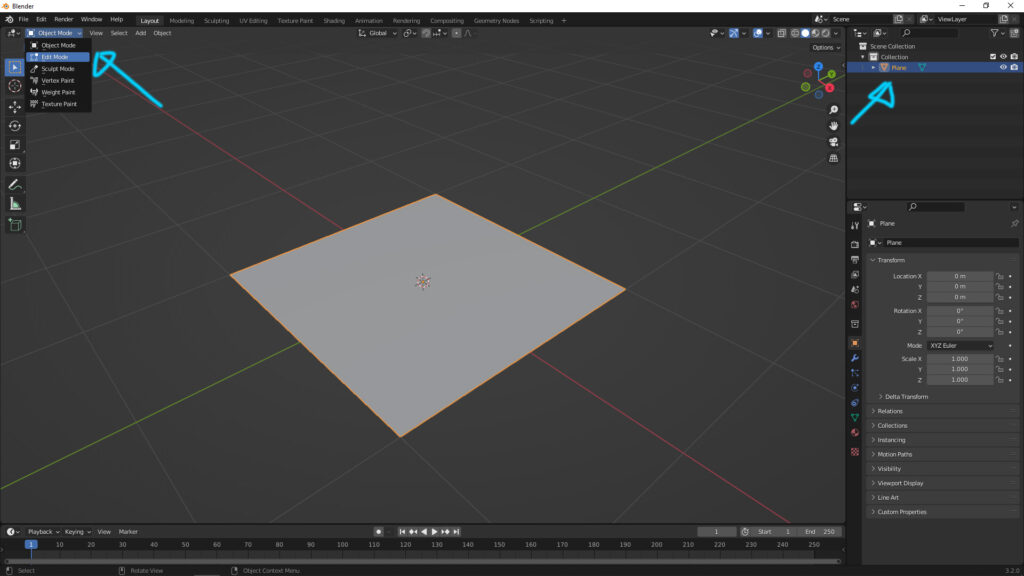
2. Make sure that the Plane is selected at the right panel, and go to Edit Mode by drop-down menu on the left (or using shortcut “Tab” to switch mode)
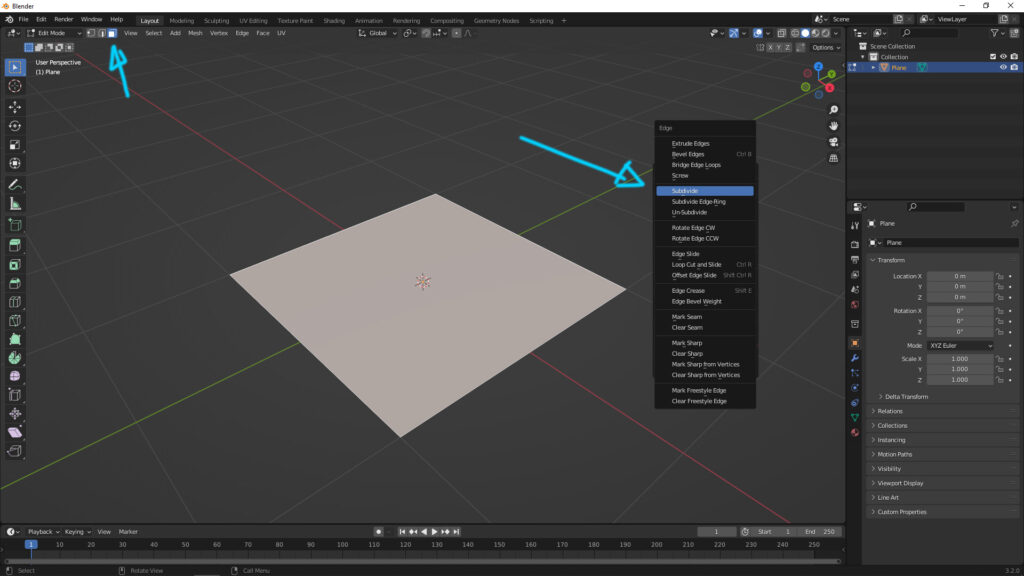
3-1. Select “Face” on the left, and Right-Click to open the menu, you can find “Subdivide” shown as below screenshot.
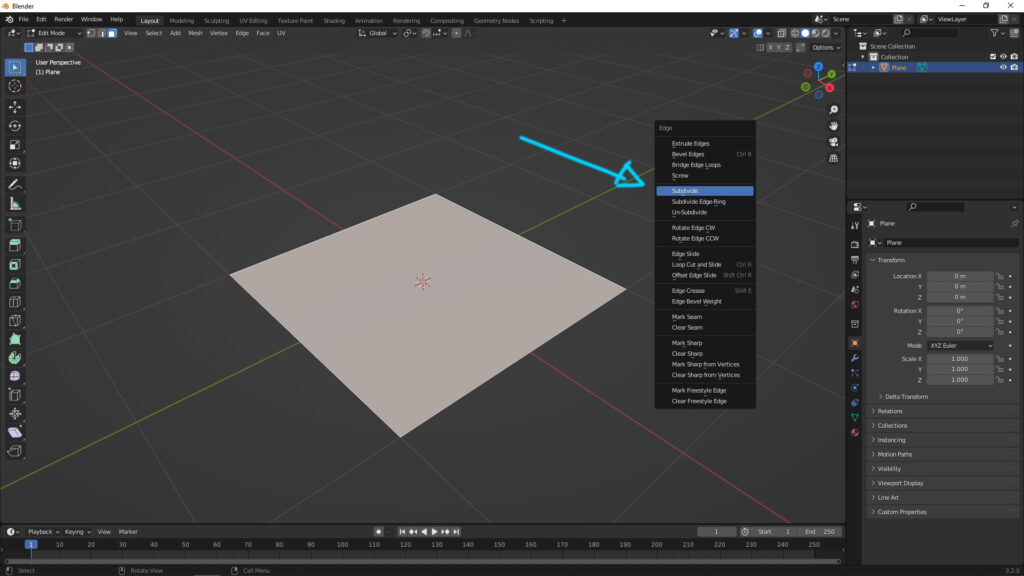
3-2. or using Shortcut “Ctrl+E” to get “Subdivide” in another menu.
4. After selecting “Subdivide”, we can add the cuts by adjusting “Number of Cuts” in the menu at bottom-right.
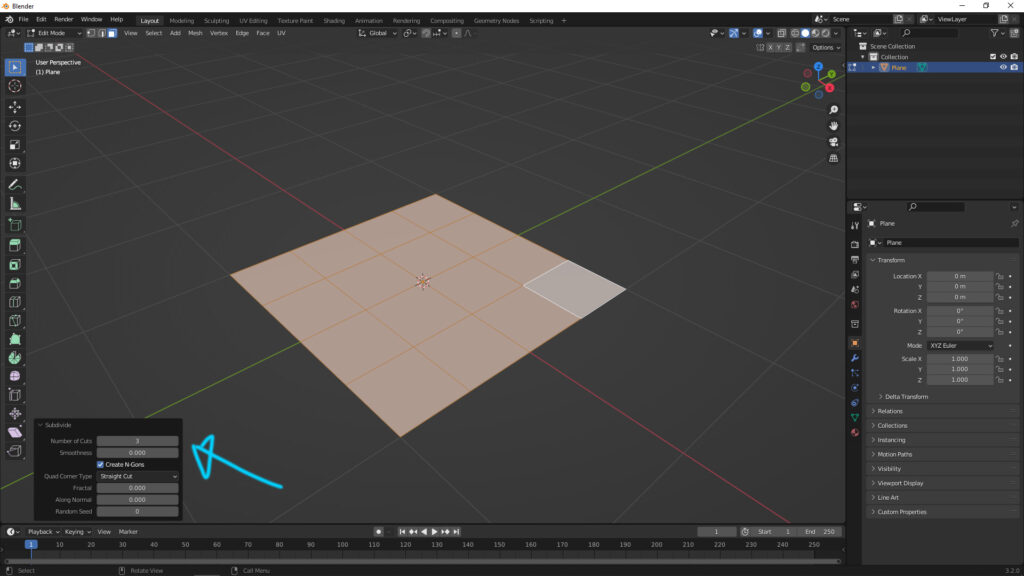
Subdivide Face
1. For making Subdivide Face of a 3D object, same as previous, select the object and go to Edit Mode. Make sure the a face is selected. And then we can open the menu by “right-click” as below shown or another shortcut “Ctrl+E”.
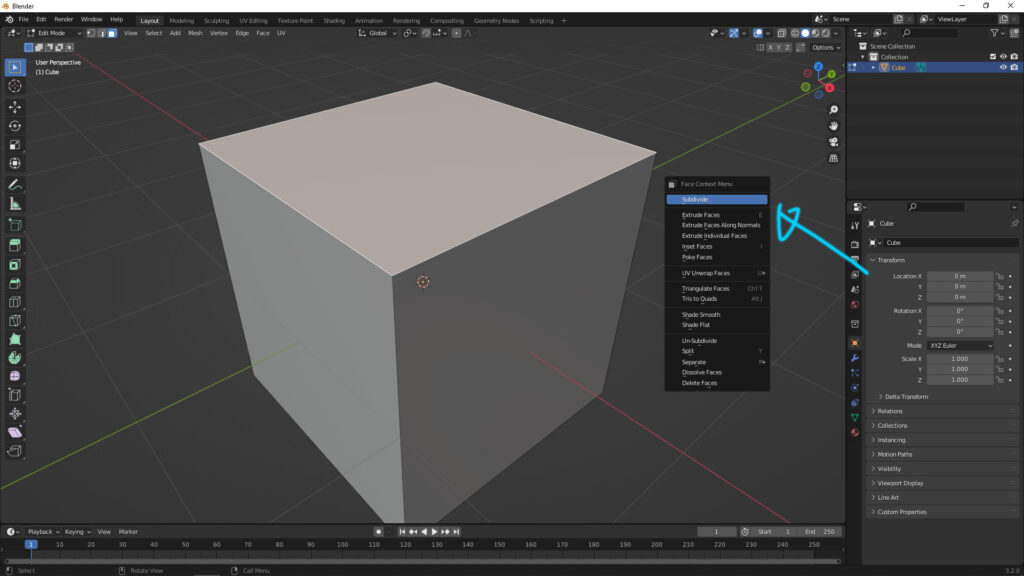
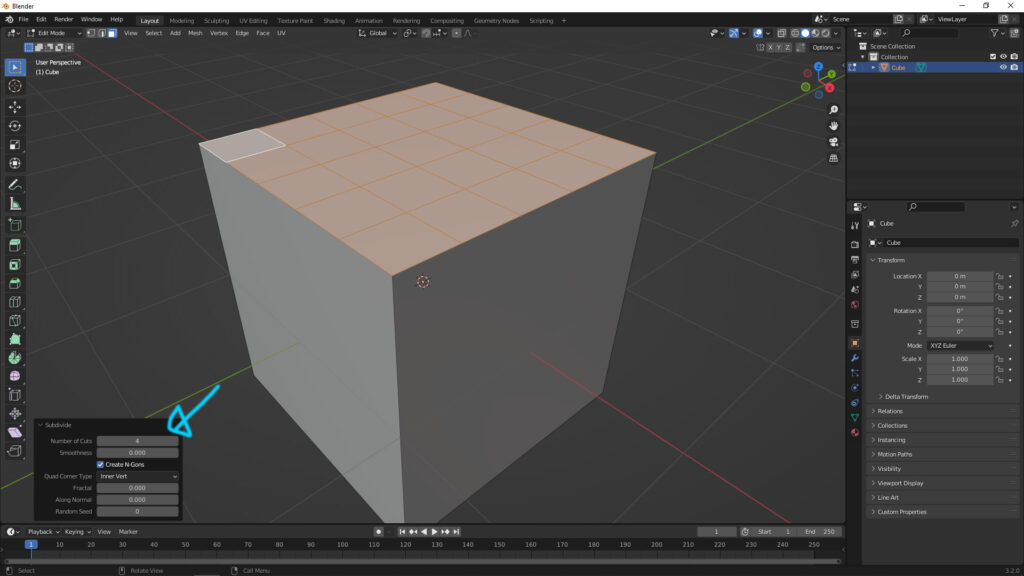
2. Same as previous, we can adjust the number of cuts on the face, to add the cuts.
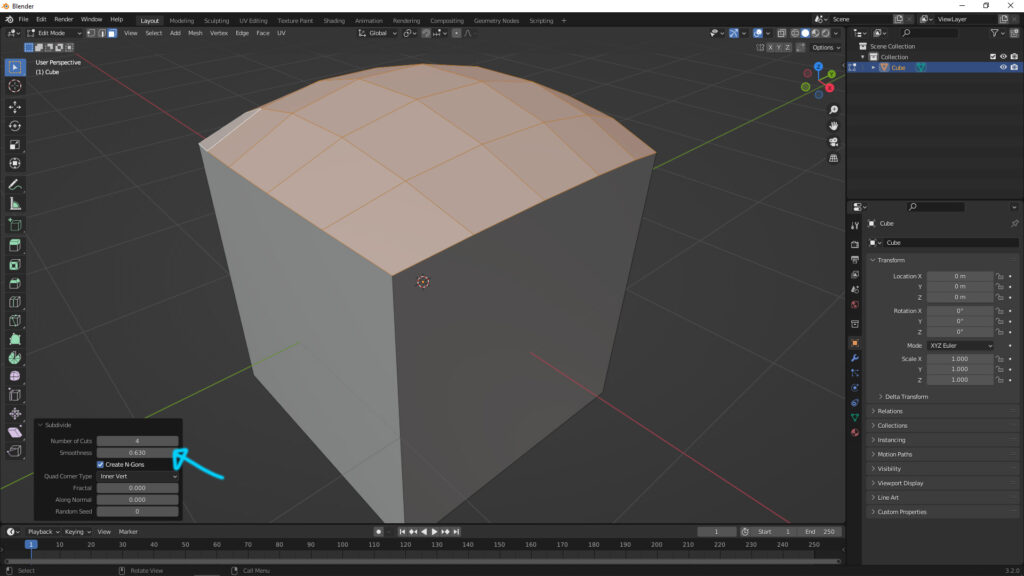
3. Moreover, if we wan to make it dome-shape, we can adjust “Smoothness”
Subdivide Cube
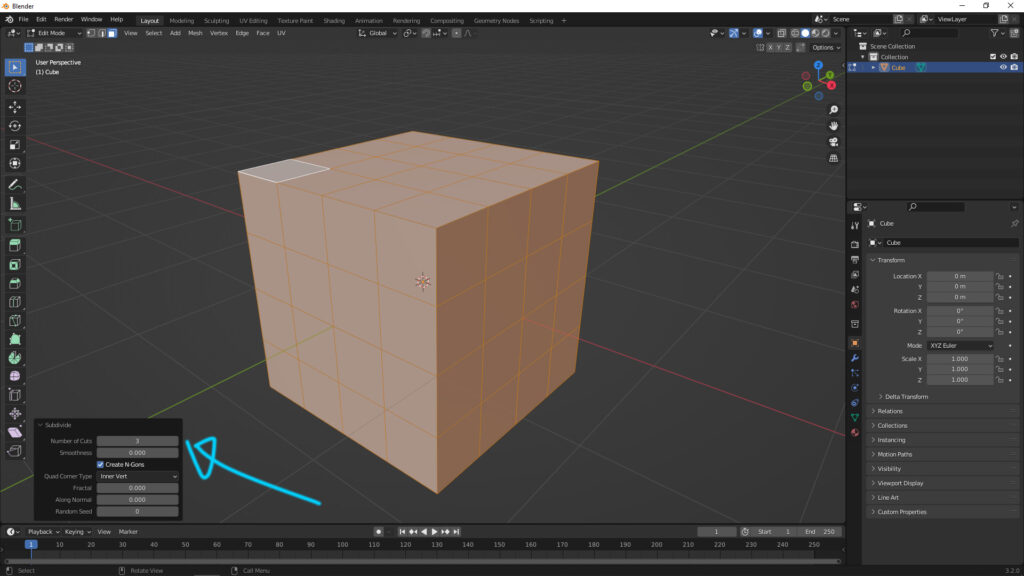
For making Subdivide Cube, the theory is same as previous cube. We have to select 6 faces on cube, and then apply “Subdivide”, and we can adjudt the number of cuts in bottom-right menu.
Have fun with CGI, to make it simple.
#cgian #aritstB #b3d #blender
Continues Reading :
How to reduce polygon in Blender
How to Check Polygon Count for Selected Object in Blender
Blender 3D Printing Tutorial – from modeling to 3D printer
Blender fill quad face to hole
Welcome to share with your friend through below buttons.
by [email protected]
