We can set the origin for any 3D object in Blender by using shortcut. The origin point or says pivot point is important point that located the 3D object in 3D space. The Blender origin is showed as small orange circle. When we translate, scale or rotate an object, these action will be according the origin point. We can quickly to set the origin location by using 3D cursor in Blender. Below steps and shortcut is showing how to set origin to centre of face, and set origin to vertex in Blender. Hope this helps. More Blender Tutorial, Tips and Tricks are available here.
How to set origin of 3D object in Blender
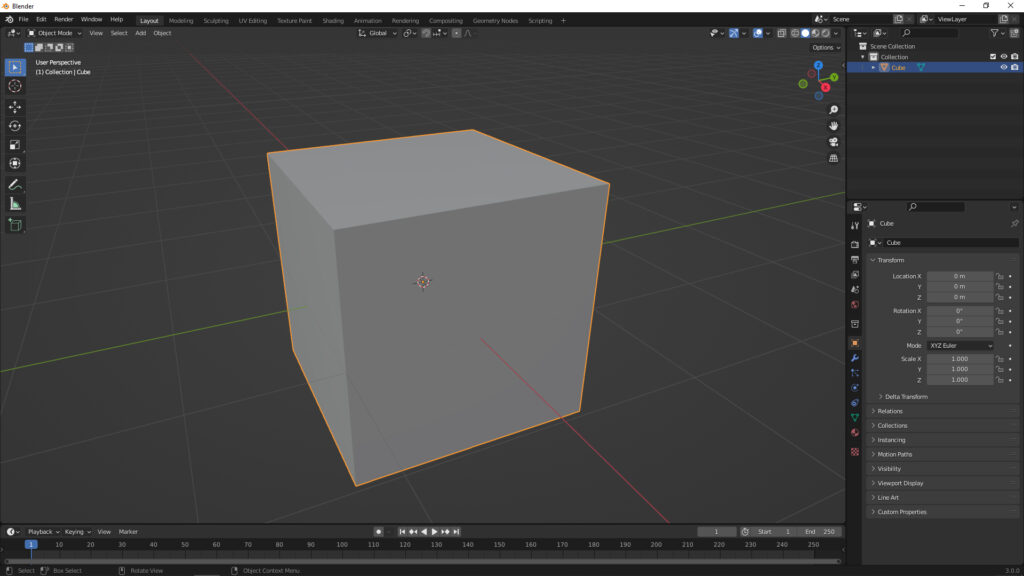
1. As per screenshot below, the origin of default cube, the small orange circle, is at the middle of 3D object.

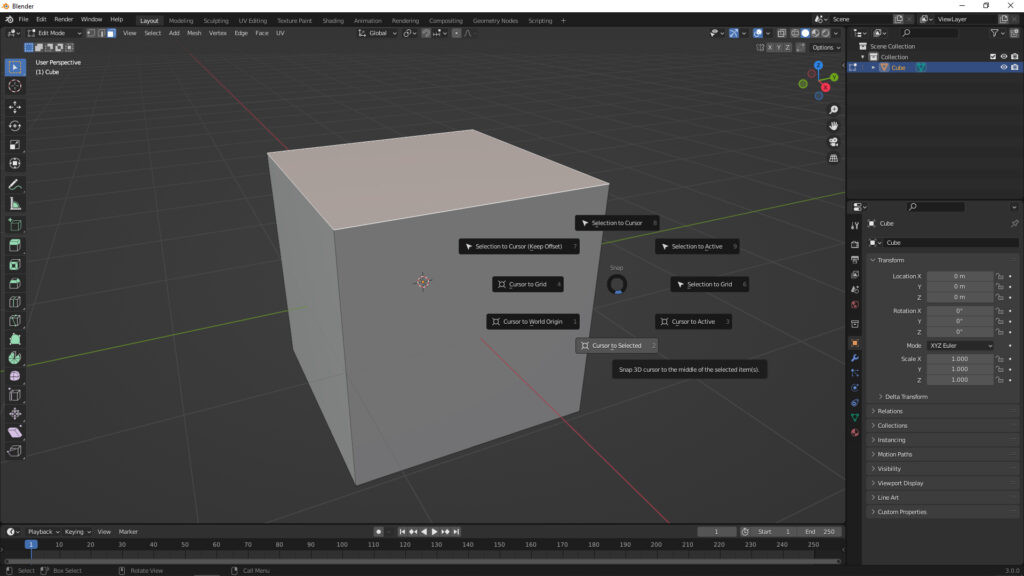
2. Go to Edit Mode, select a face, and click Shortcut “Shift + S” and select “Cursor to Selected”.

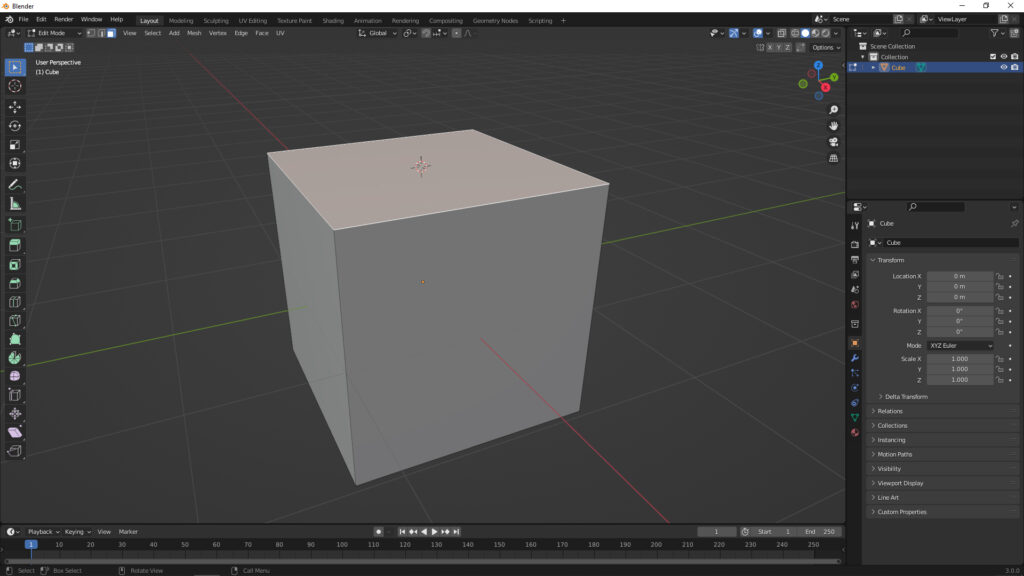
3. The 3D Cursor is now on the centre of face.

4. Now, go to Object Mode, select Object > Set Origin > Origin to 3D Cursor. The origin, the small orange circle, then set to same location of 3D cursor, that is the middle of face.
How to set origin to vertex
In addition, if we select a vertex in step 2 and “Cursor to Selected”, the 3D Cursor will be move to a vertex selected ; if we select a edge in step 2 and “”Cursor to Selected”, the 3D Cursor will be move to the centre of edge selected.
Set Origin with 3D Viewport Pie Menus
Here is a video showing the alternative way to set origin with addon 3D Viewport Pie Menus. Have a look at hope this helps.
Click here to subscribe this YouTube channel, more video will be shared with you. Let’s create with Blender together!
Feel free to watch more video on【YouTube Playlist】
More Blender Tutorial, Tips and Trick at cgian.com
#b3d #blender #cgian
Continues Reading:
How to set and reset 3D cursor in Blender
How to select back Vertices, Edges, Faces behind object in Blender
Switch Perspective view to Orthographic view in Blender
Tips and Tricks
from artist.B
Welcome to share by using below buttons.
