
Here is to show how to make Landscape and Mountains with Blender free addon, which the addon is pre-installed in Blender. Therefore, we don’t need to download, and we can activate the addon in default Blender Preferences. This free addon can generate different shape of landscape and mountain with few click. Therefore, this is a quick workflow to make landscape 3D within few minutes. Please follow the below steps to activate this Landscape Addon and add landscape and mountains. Hope this helps.
How to make Landscape and Mountains with Blender free addon
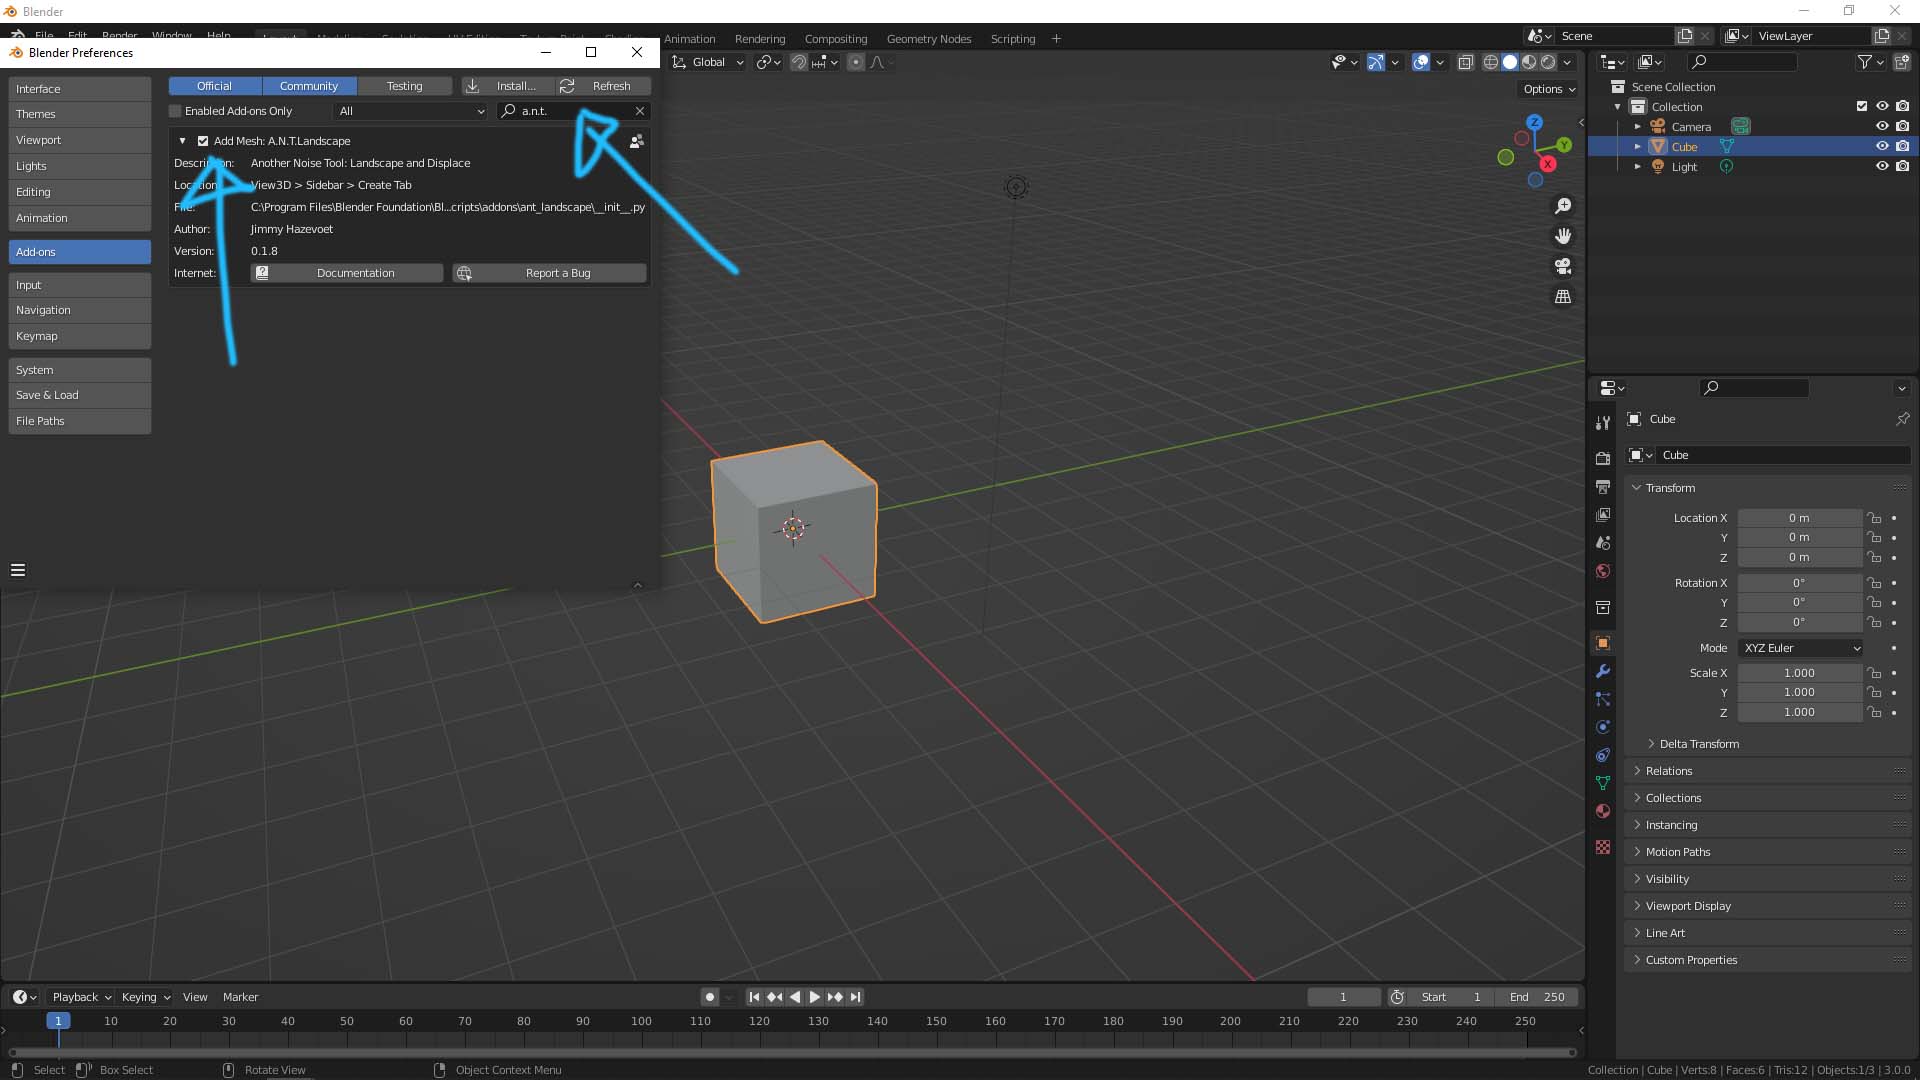
1. Go to Edit > Preferences, to open Blender Preferences Window.
2. Then search A.N.T. Landscape , and check the box to activate the addon.
3. Then go to right side of viewport, click on the arrow to show the tabs. And switch the tab to Create.
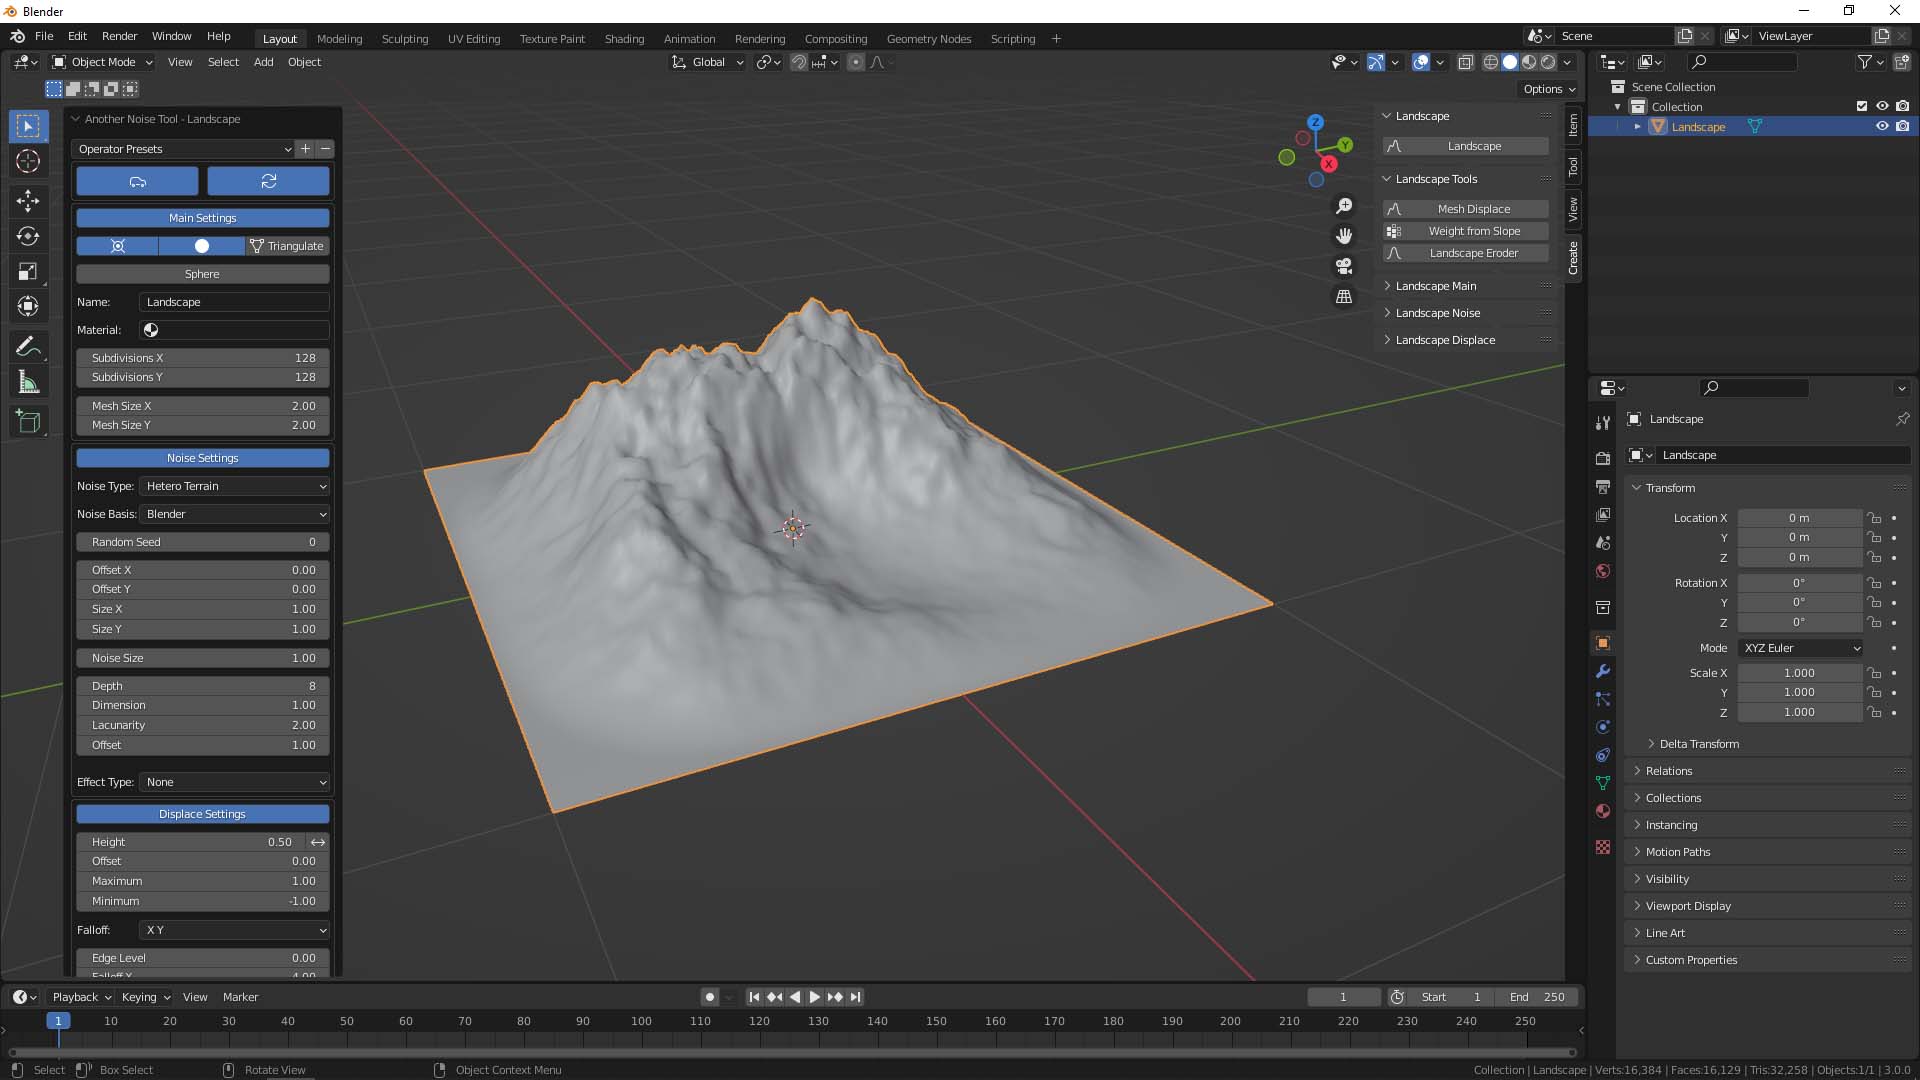
4. We can find Landscape Button as below screenshot, click to generate a Landscape 3D model.

5. Now we have a landscape 3D model, then open the menu of the left bottom, we can set the different shape of landscape and mountain.
Here is more about how to adjust the shape of landscape and mountain, and how to add texture into Landscape. Watch the Tutorial Video here,

Hope this helps. More Blender Tutorial, Tips and Tricks are available here.
Have fun with CGI, let’s create.
#cgian #aritstB #b3d #blender
Continuous Reading:
Blender Realistic Ocean Animation
Blender addon – Dynamic Sky
How to make a cloud in Blender
How to split your screen in Blender and close viewport
Feel free to share with your friend.
by [email protected]
