
To make an animation, we need to add keyframe across the timeline in Blender. Here is a quick tutorial to show the 3 ways how to insert keyframe in Blender. Hope this helps.
How to add keyframe in Blender
To insert the keyframe, make sure that the object is selected. Then the object will be set with keyframe across the timeline by using below 3 ways.
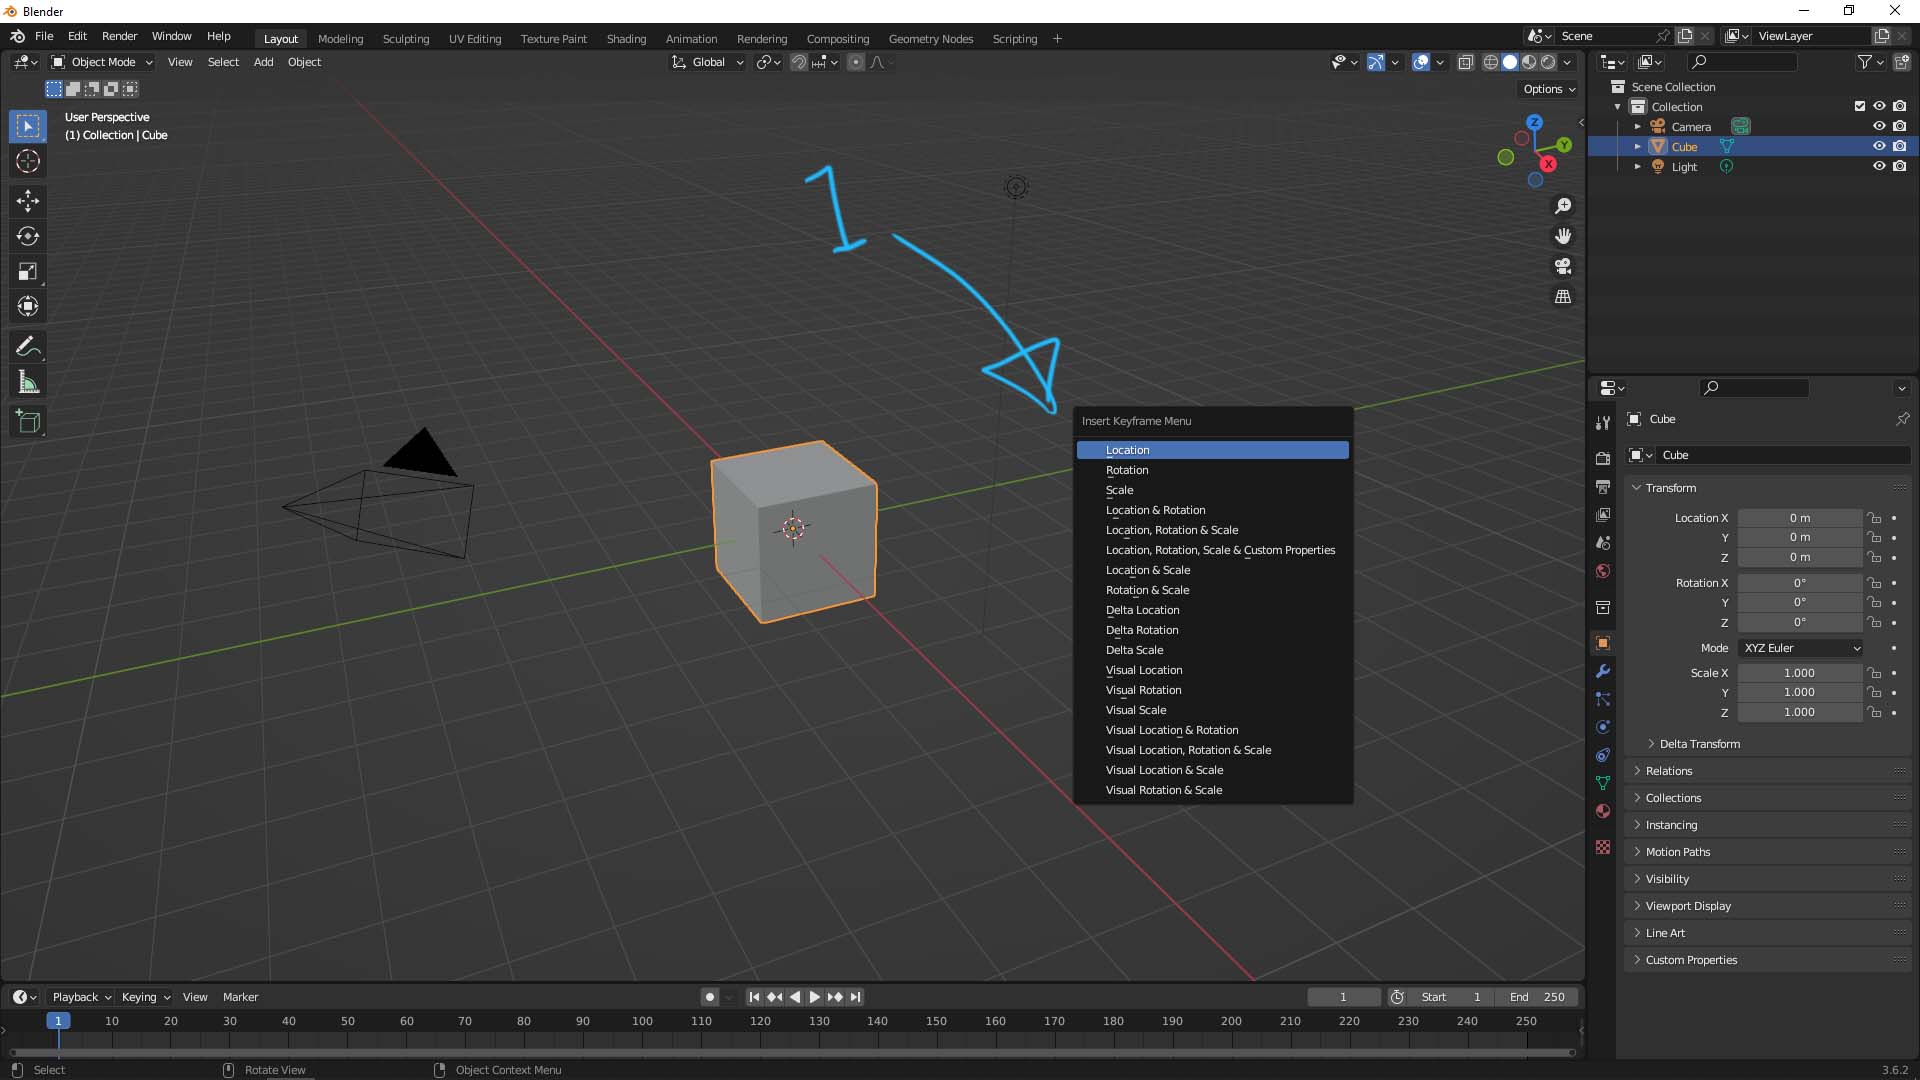
1. Press Shortcut I, then we can have Insert Keyframe Menu, we can select any variable to set the keyframe, as below screenshot shown.
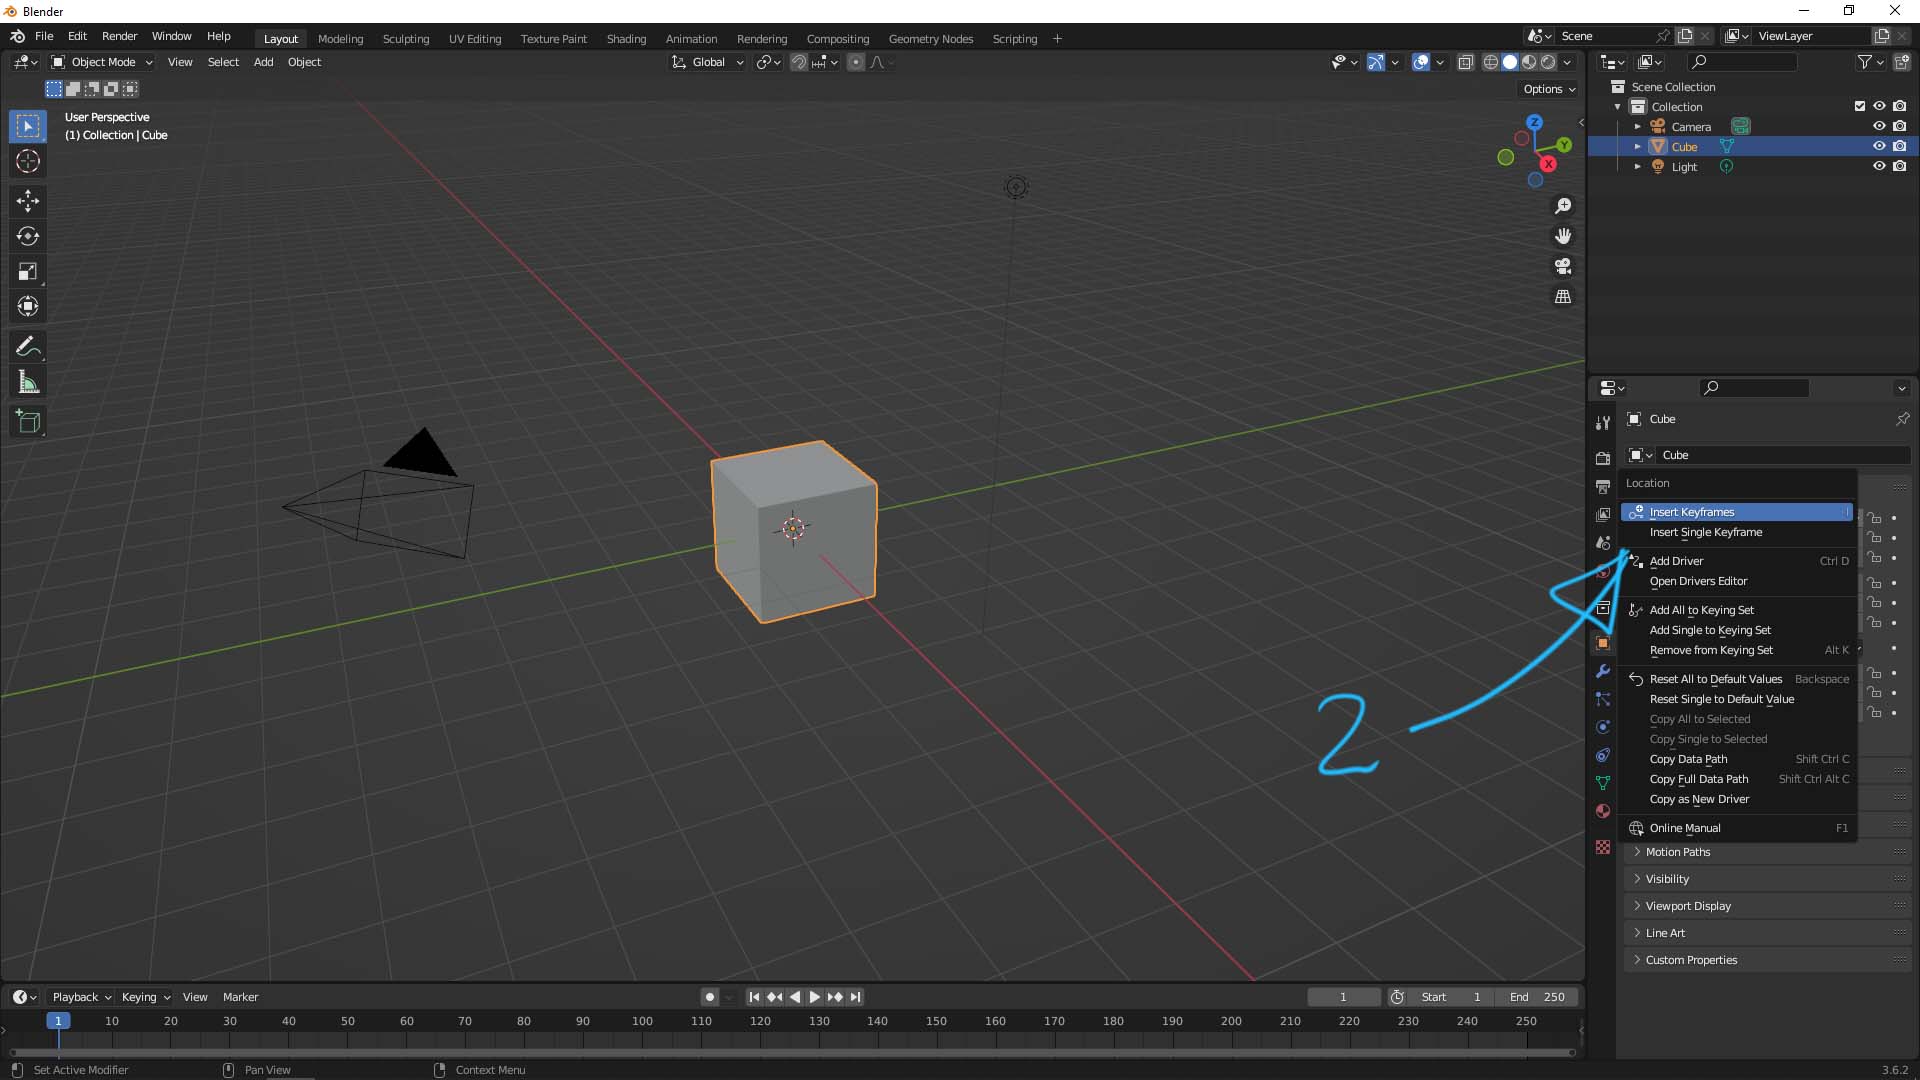
2. The second way is to move the cursor over the variable, for example in below screen, Right-Click over Location, we can choose Insert Keyframe to set keyframe.
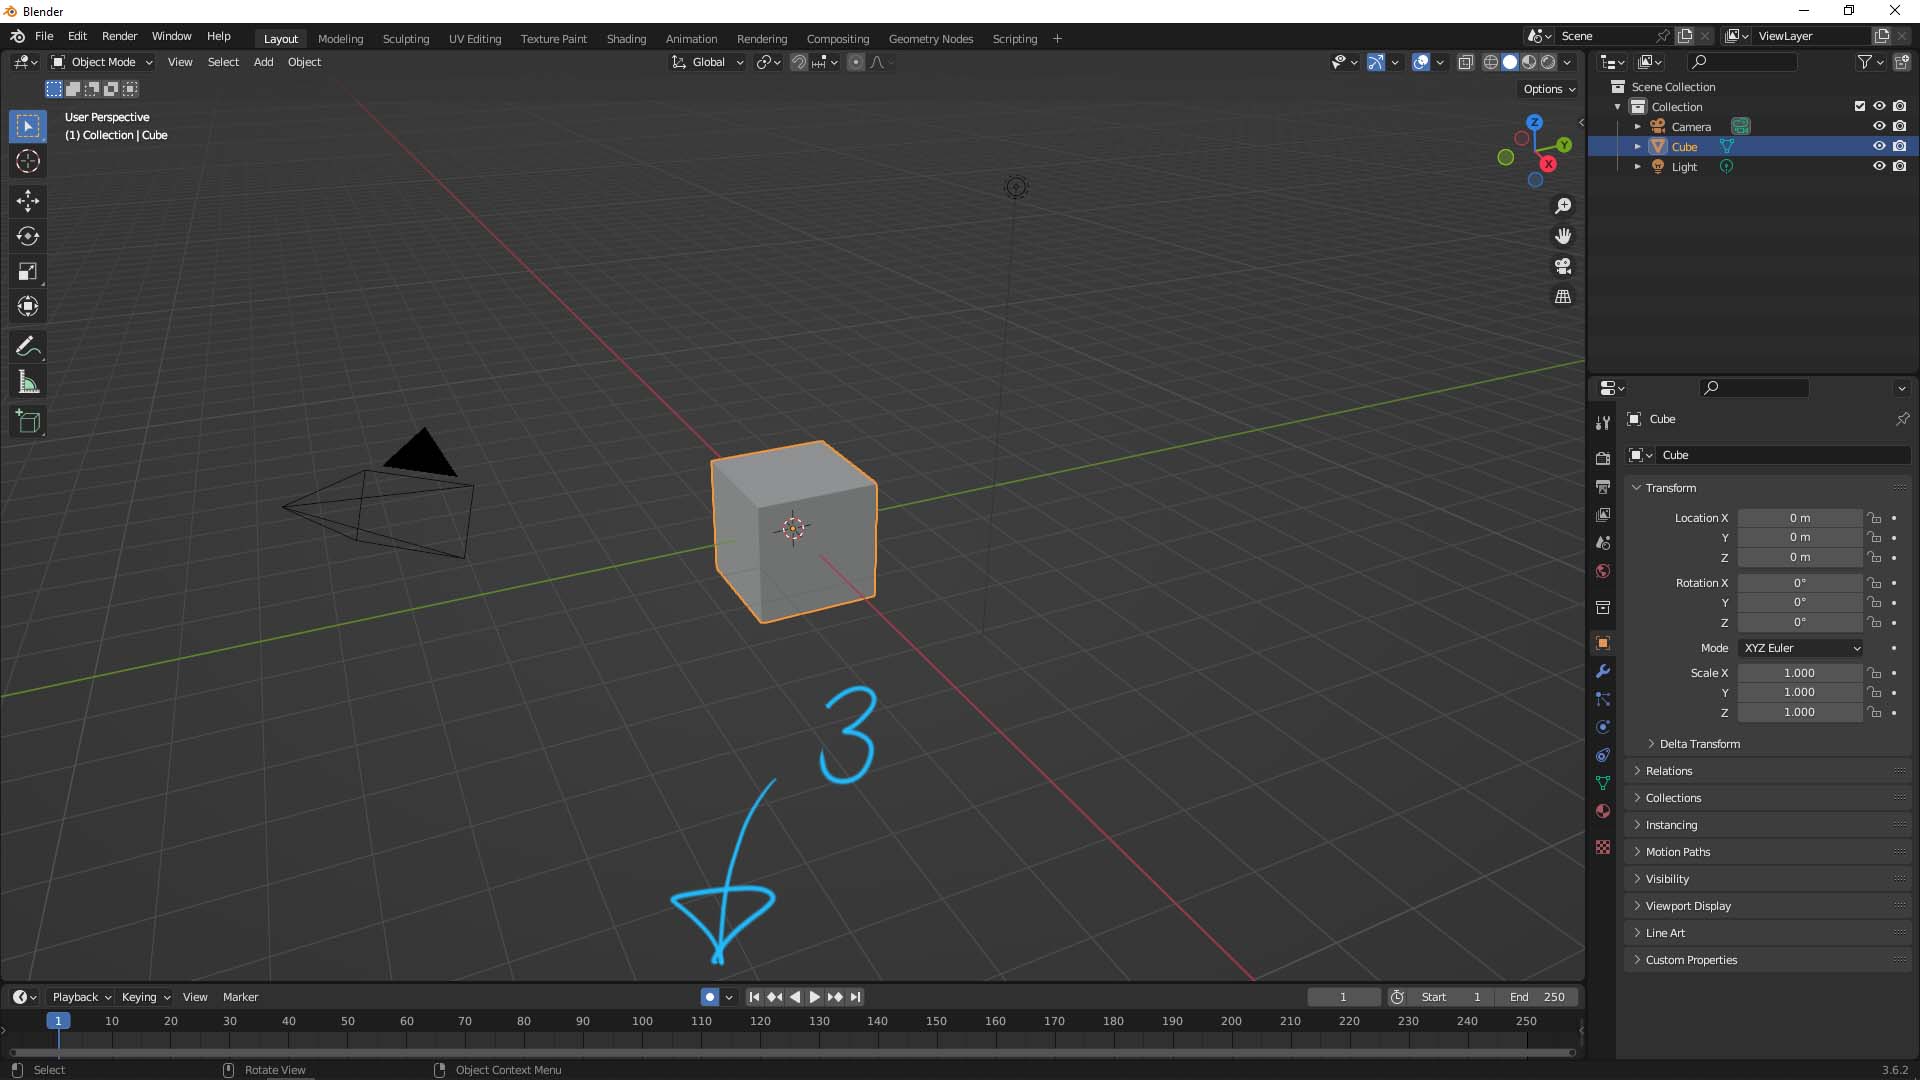
3. The third way is to use Auto-keying, turn on the Blue Dot as below screenshot. Then, when changing the any variables of the object, we can insert the keyframe automatically.
Hope this helps. More Blender Tutorial, Tips and Tricks are available here.
Have fun with CGI. Let’s Create!
#cgian #b3d #blender
Continuous Reading:
Blender Animation Tutorial for Beginners – Free on YouTube
Blender Export FBX with animation and texture
How to render in Blender for beginners step by step
How to add workspace window and reset to default in Blender
Feel free to share with your friend.
by [email protected]
