
In Blender, pivot point has been known as Origin. If we want to set pivot point, we can set the Origin in Blender. Below steps are showing how to set pivot point, therefore we can move, scale, and rotate according to origin, pivot point. Hope this helps.
How to set pivot point in Blender
1. When we select an object, we can see a Orange Dot, that is Origin or says pivot point.
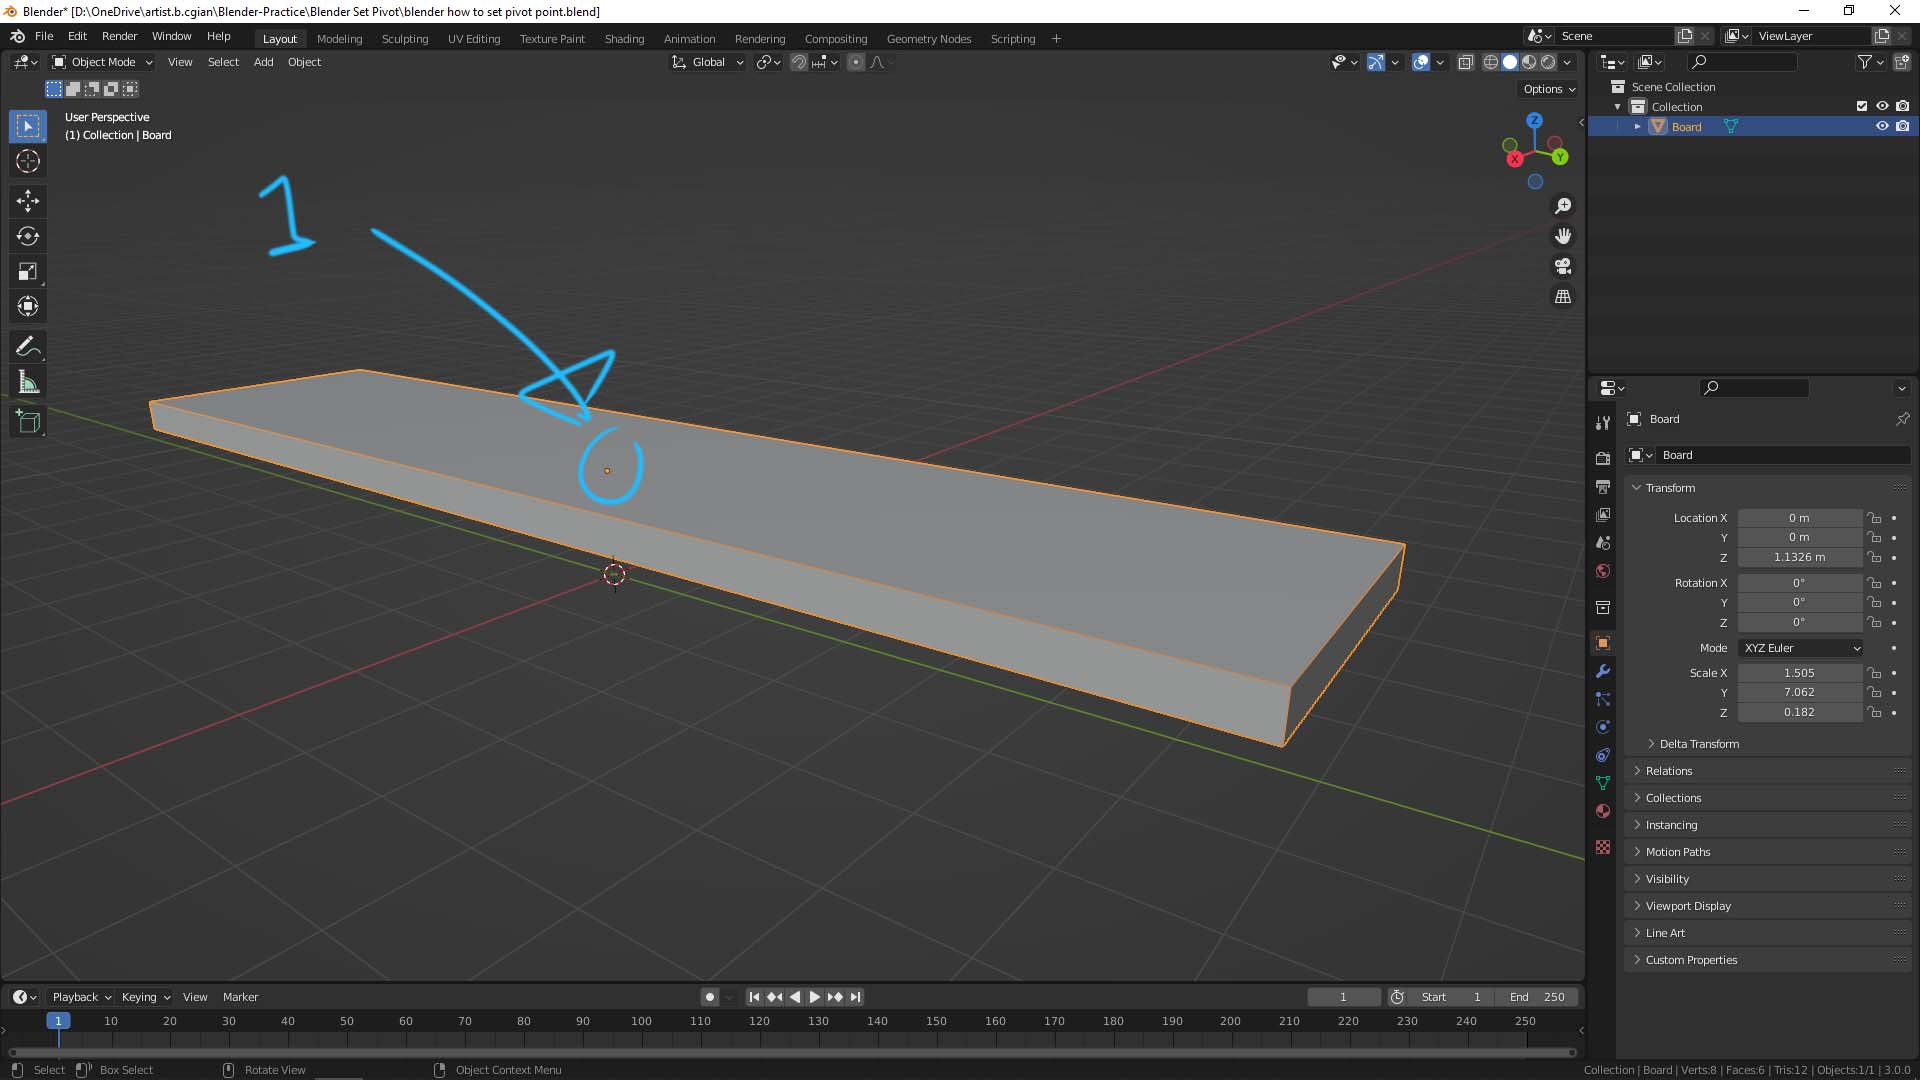
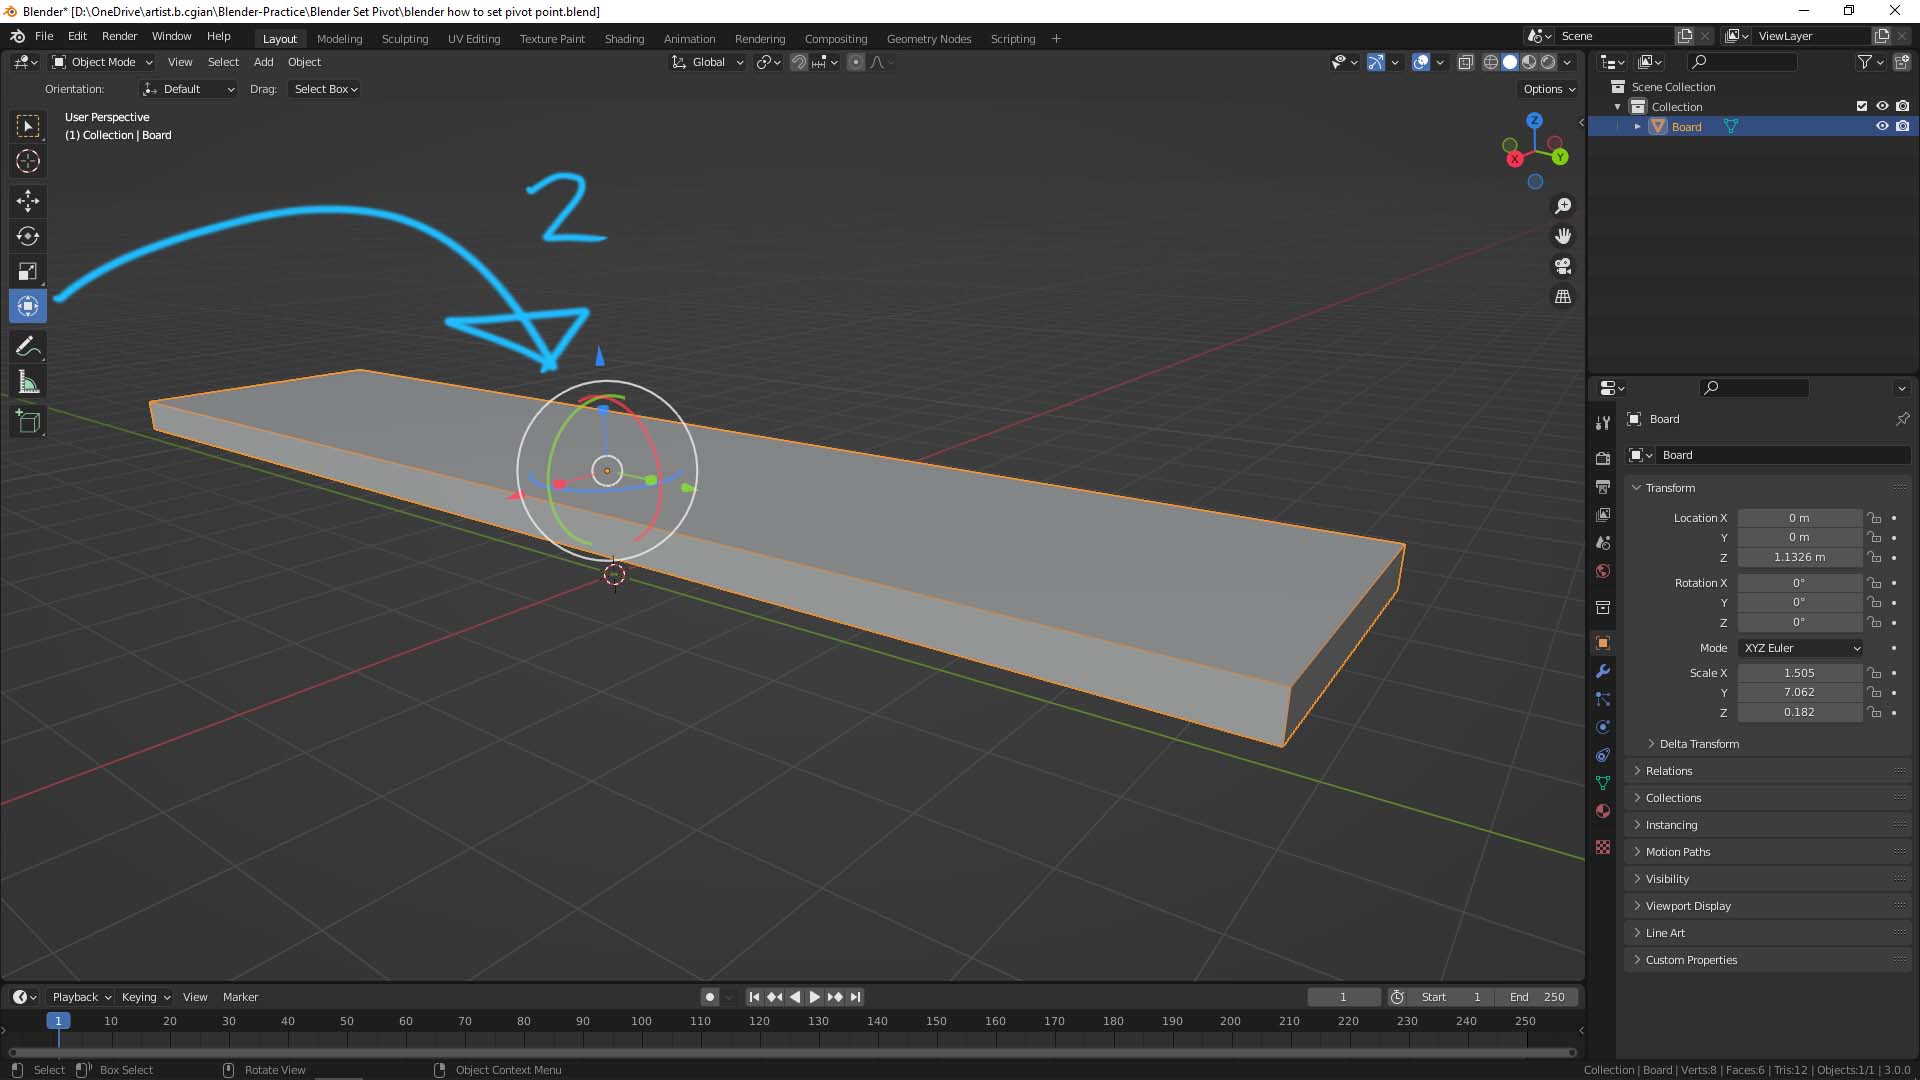
2. If we click the Transform icon, we can see that the Gizmo is located at Origin.
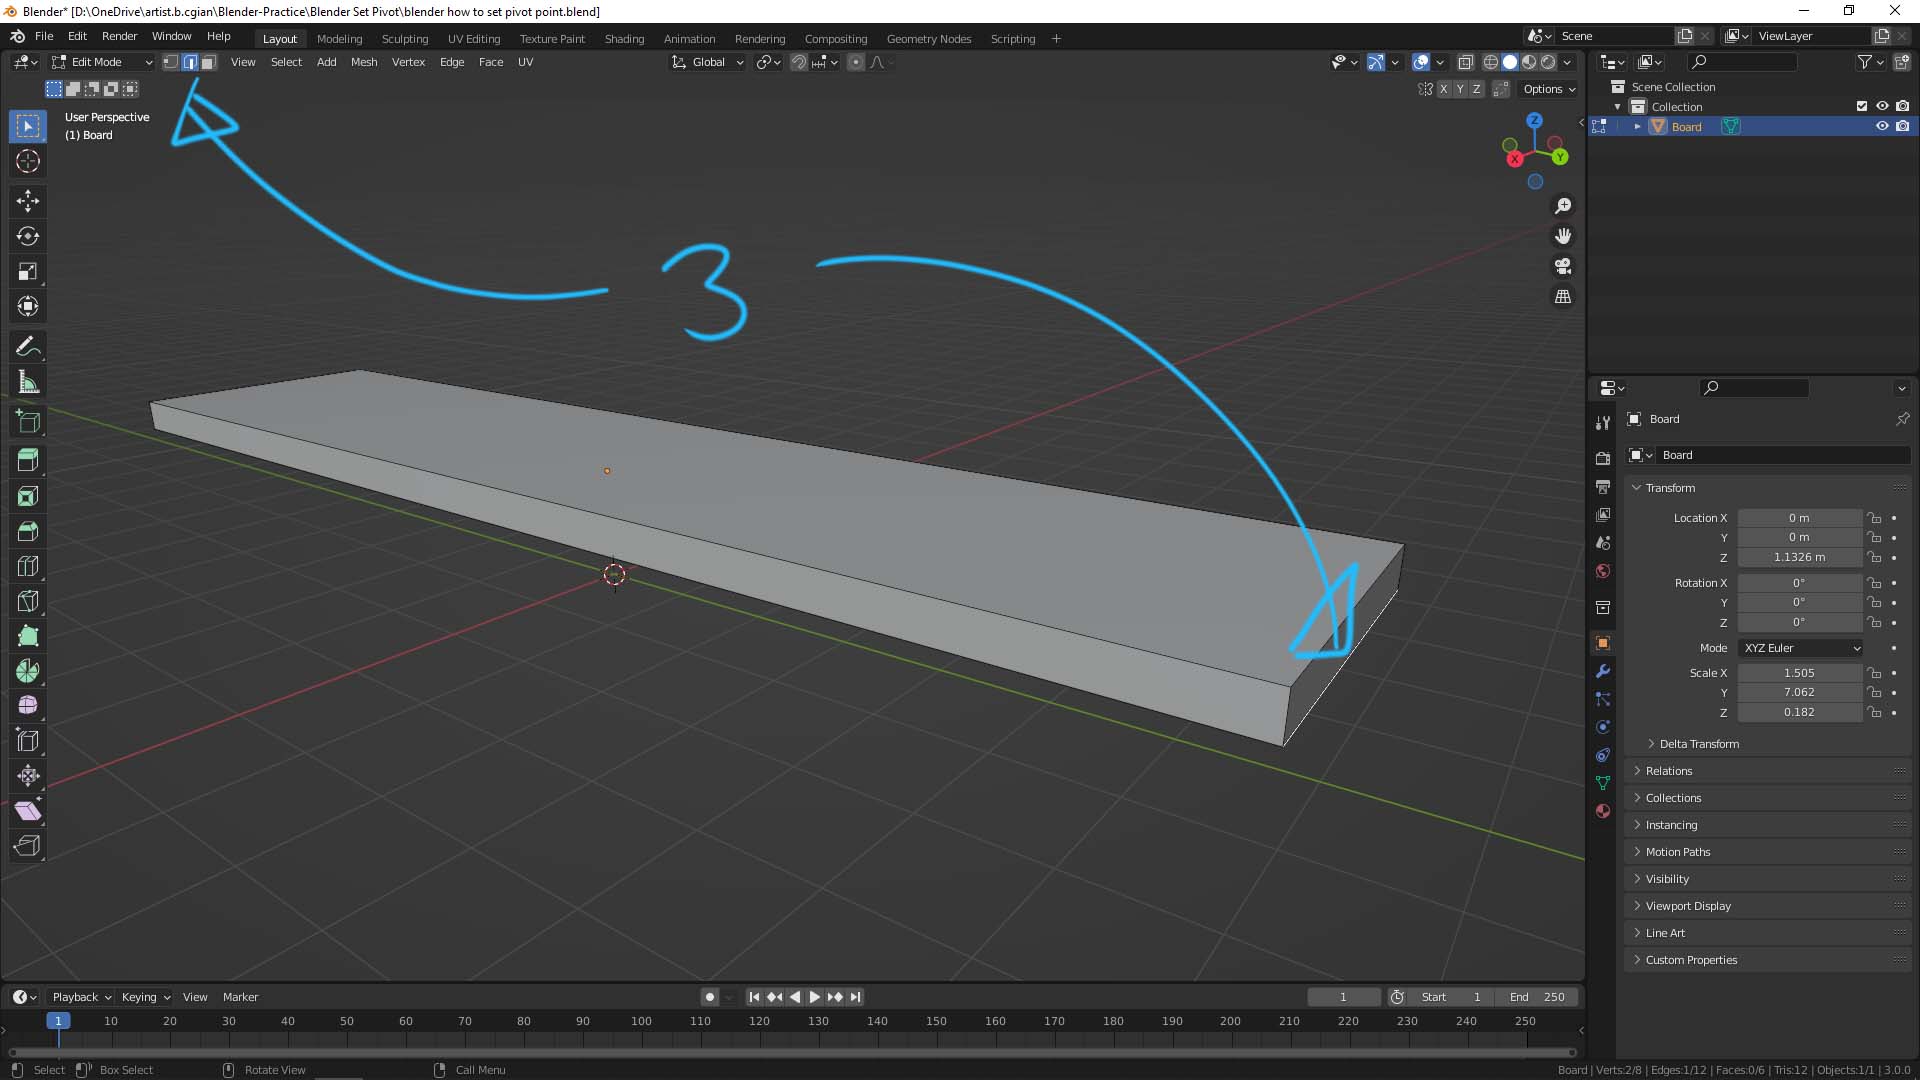
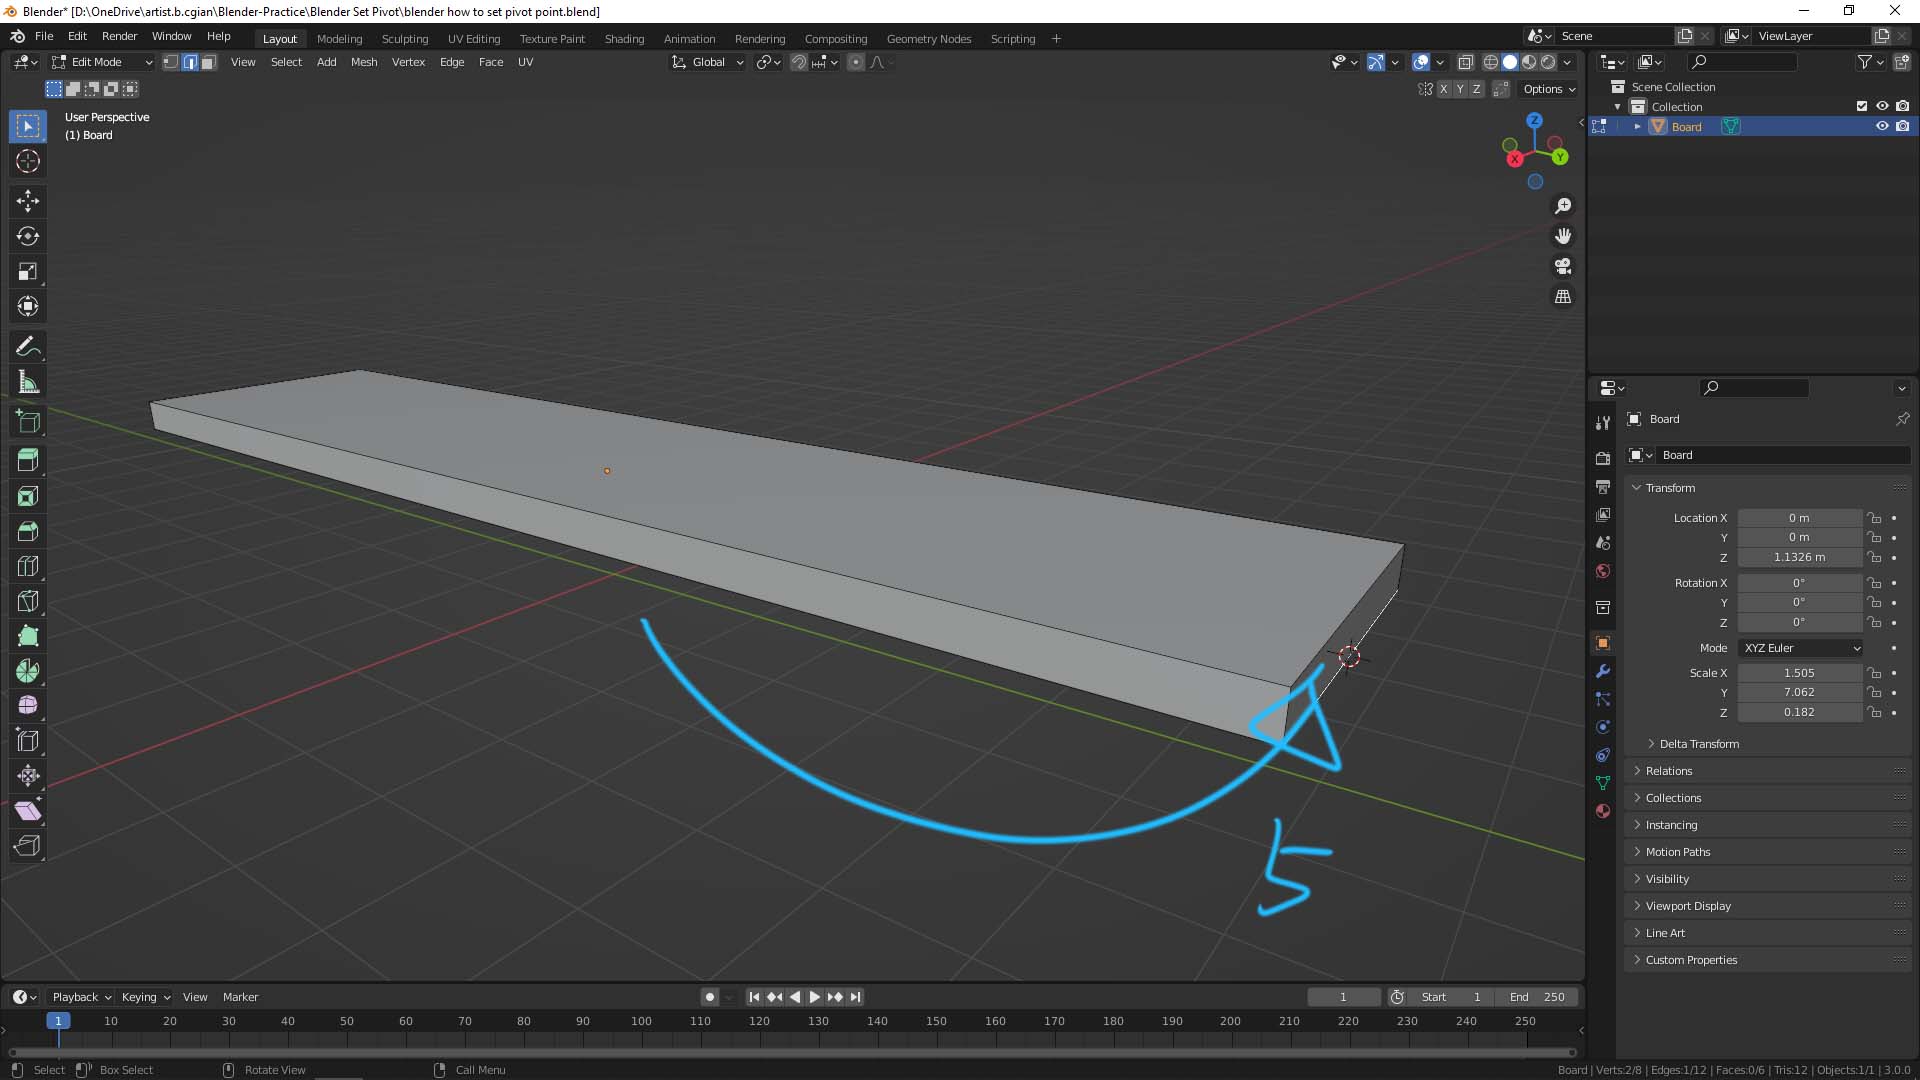
3. If we want to set the origin, pivot point, to other location, one of the ways is to set 3D cursor first. For example as below to set 3D cursor, we need to go to Edit Mode. I select an edge at the bottom of 3D object.
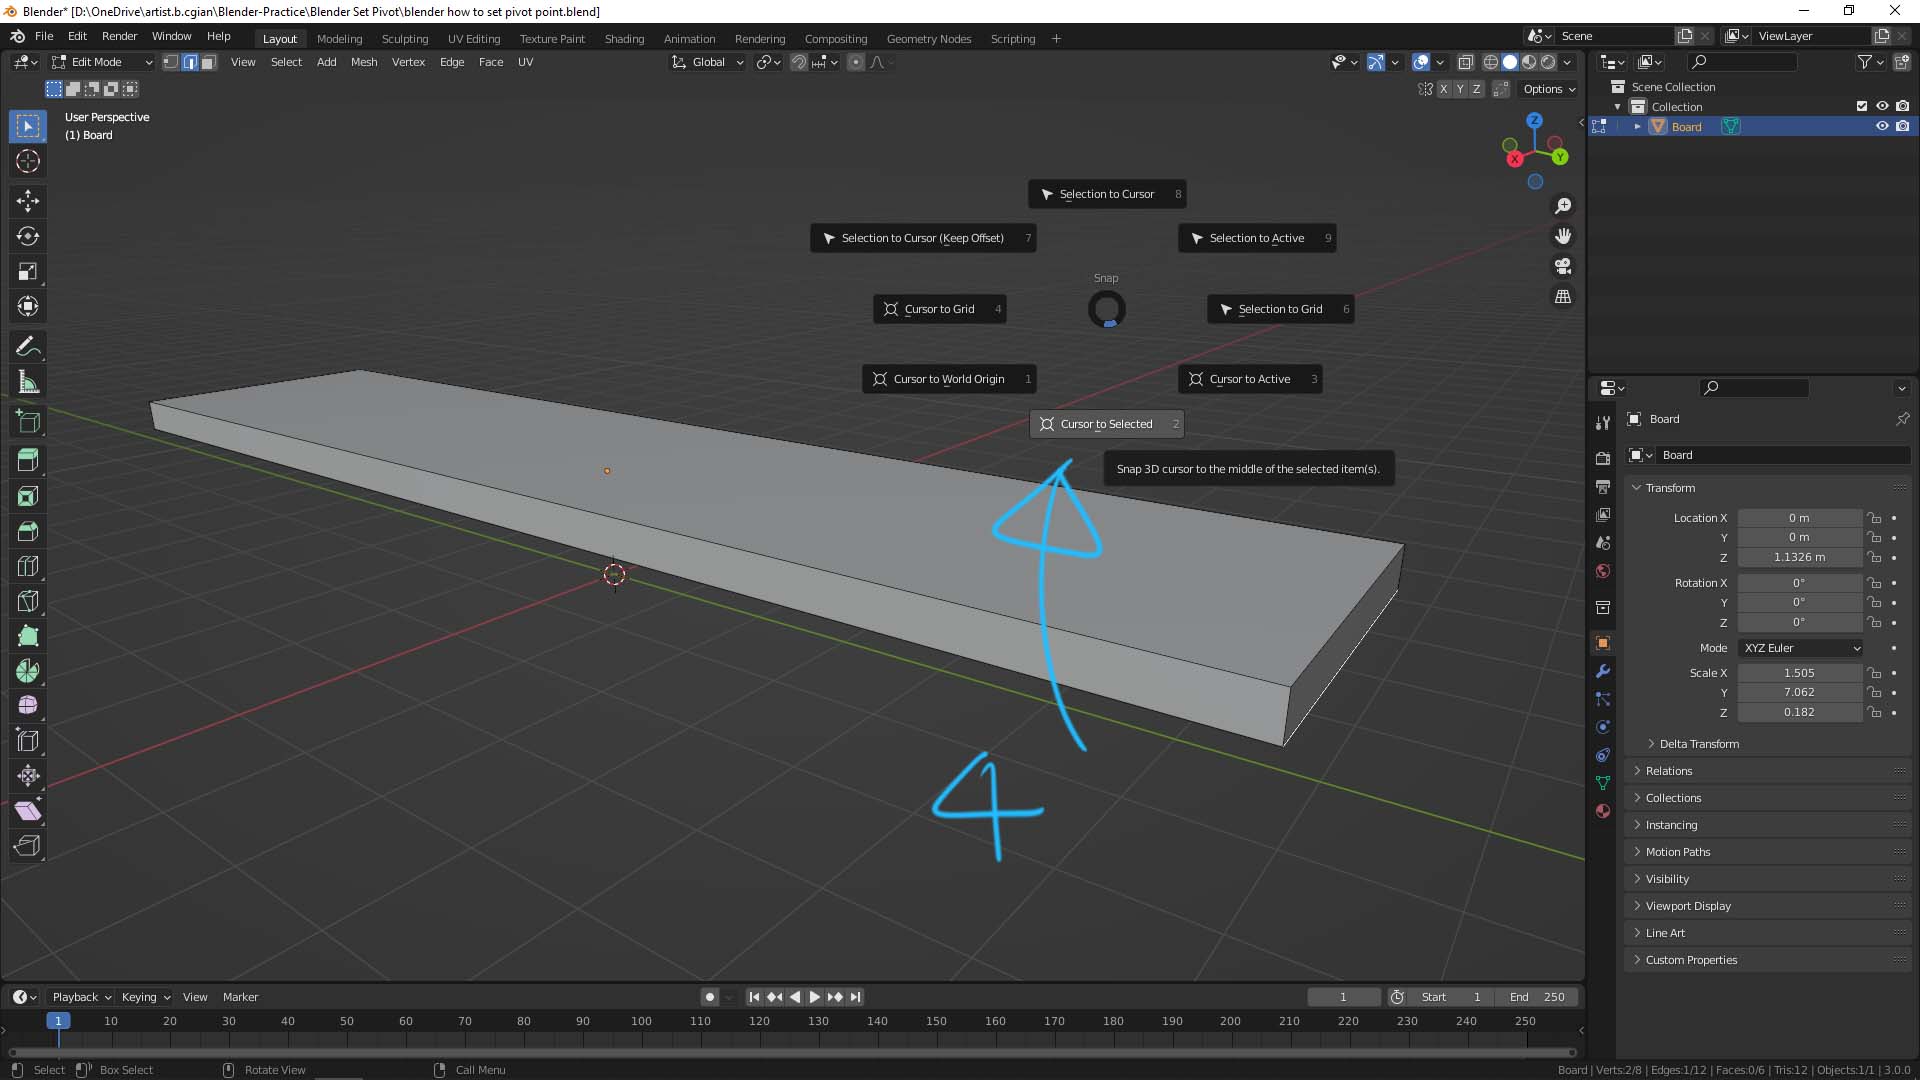
4. After selecting, shortcut Shift S to open the menu, we can choose ” Cursor to Selection”.
5. Then, the 3D cursor, we be move to selection, the middle of edge in this example.
6. Go back to object, go to Object > Set Origin > Origin to 3D cursor.
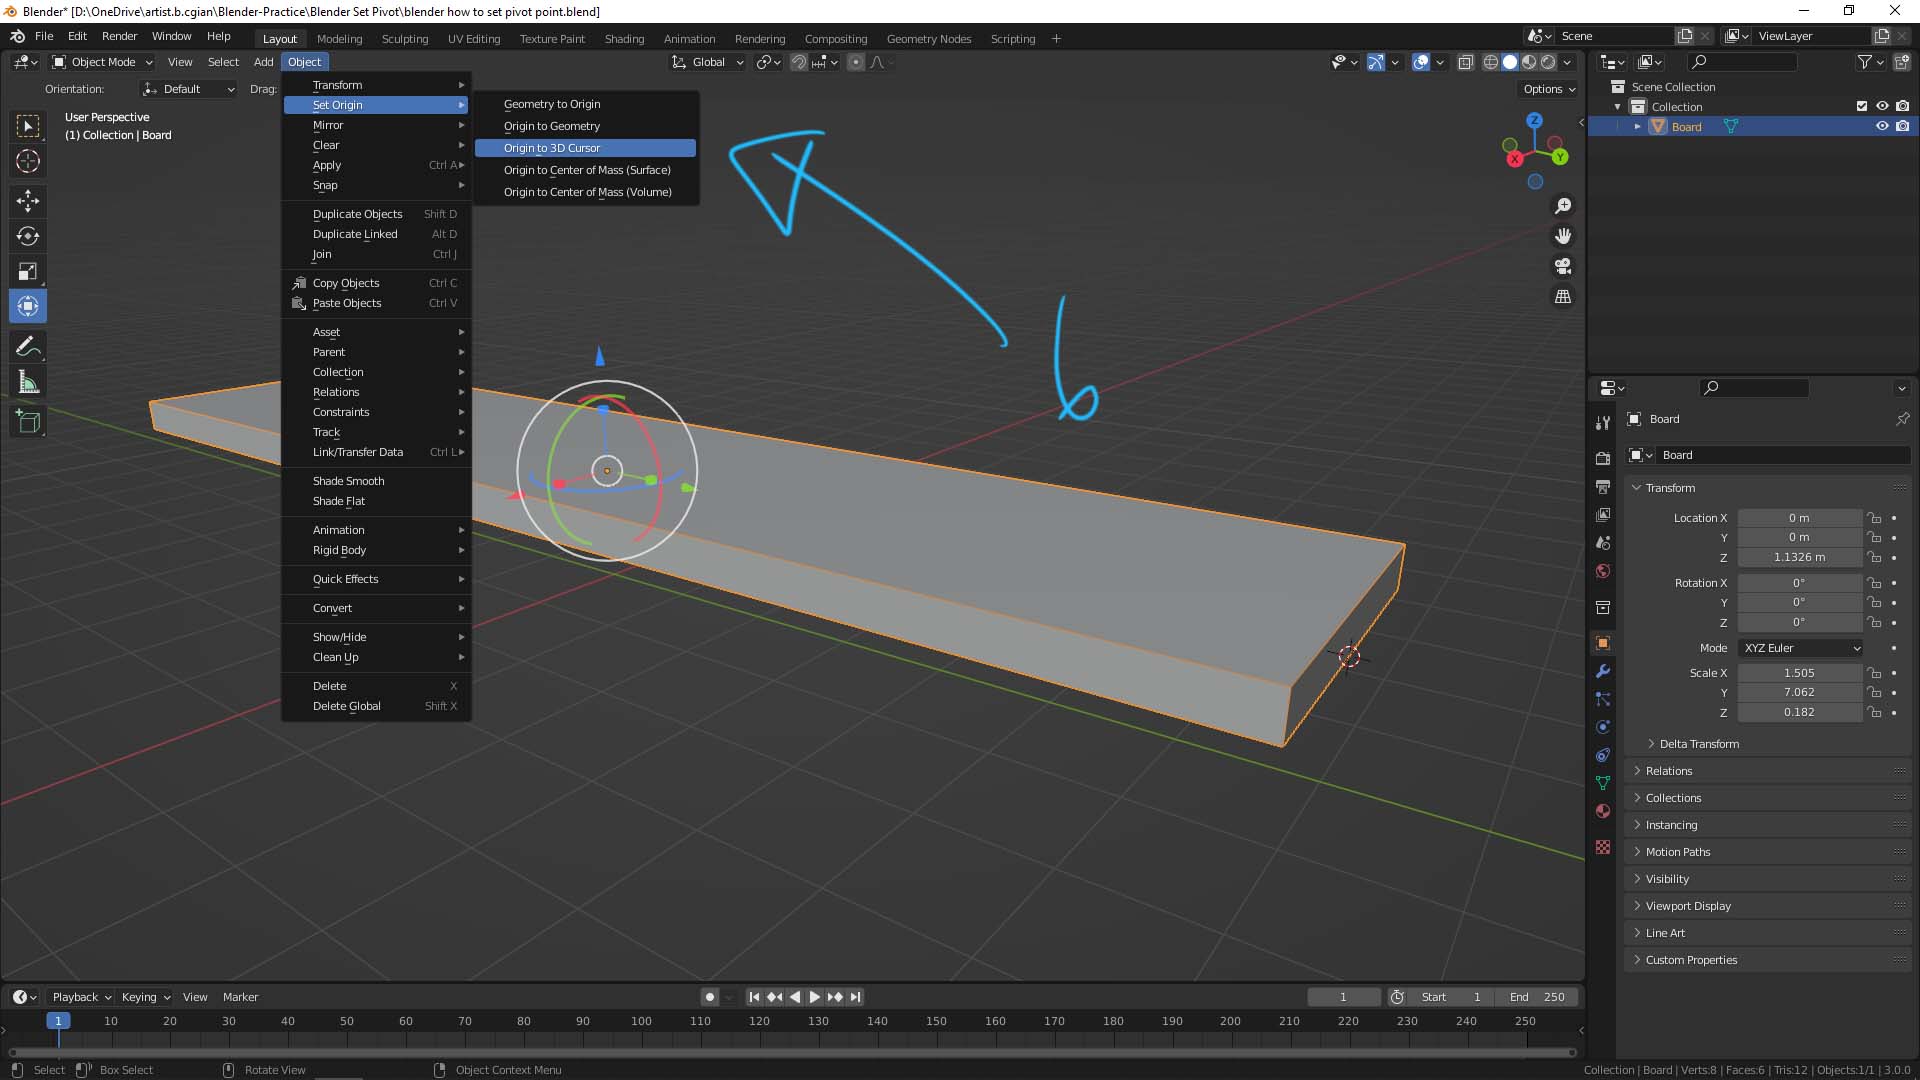
7. The origin, pivot point, is then move to 3D cursor where is the middle of bottom edge.
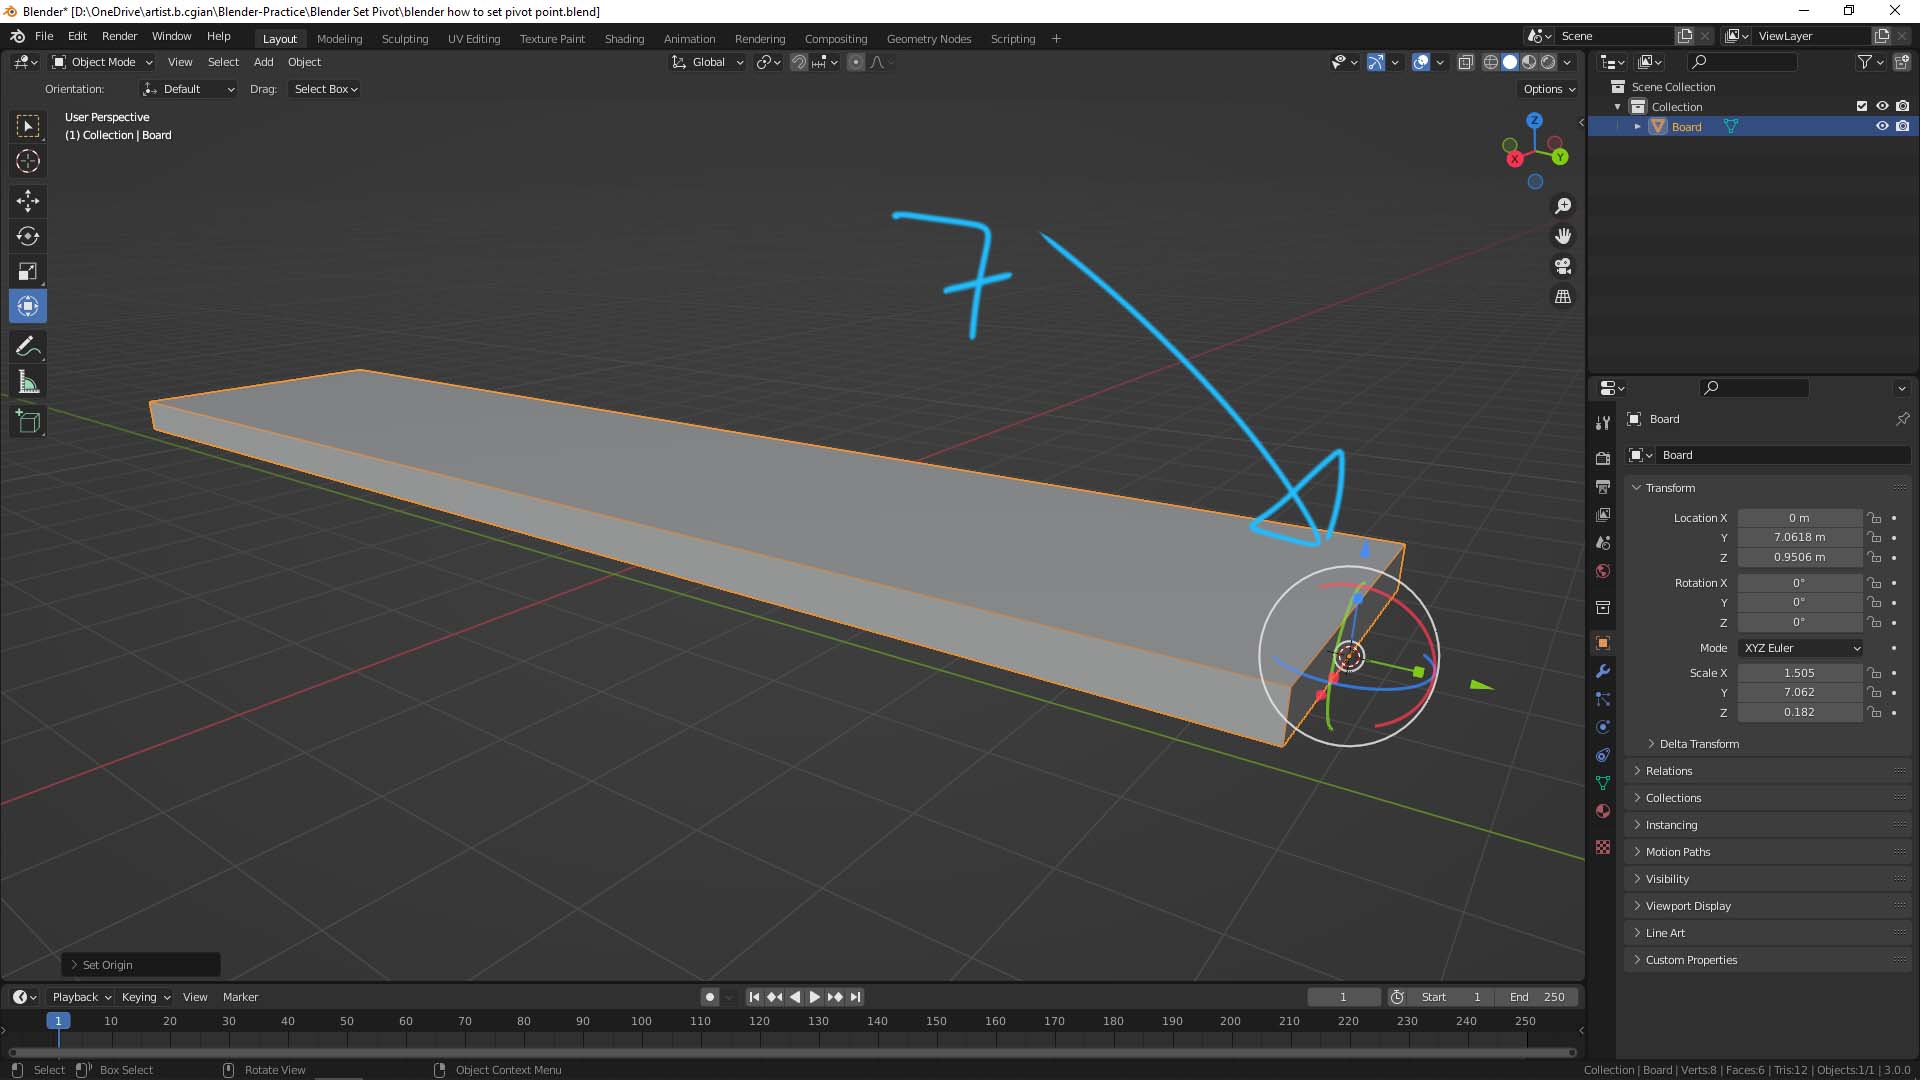
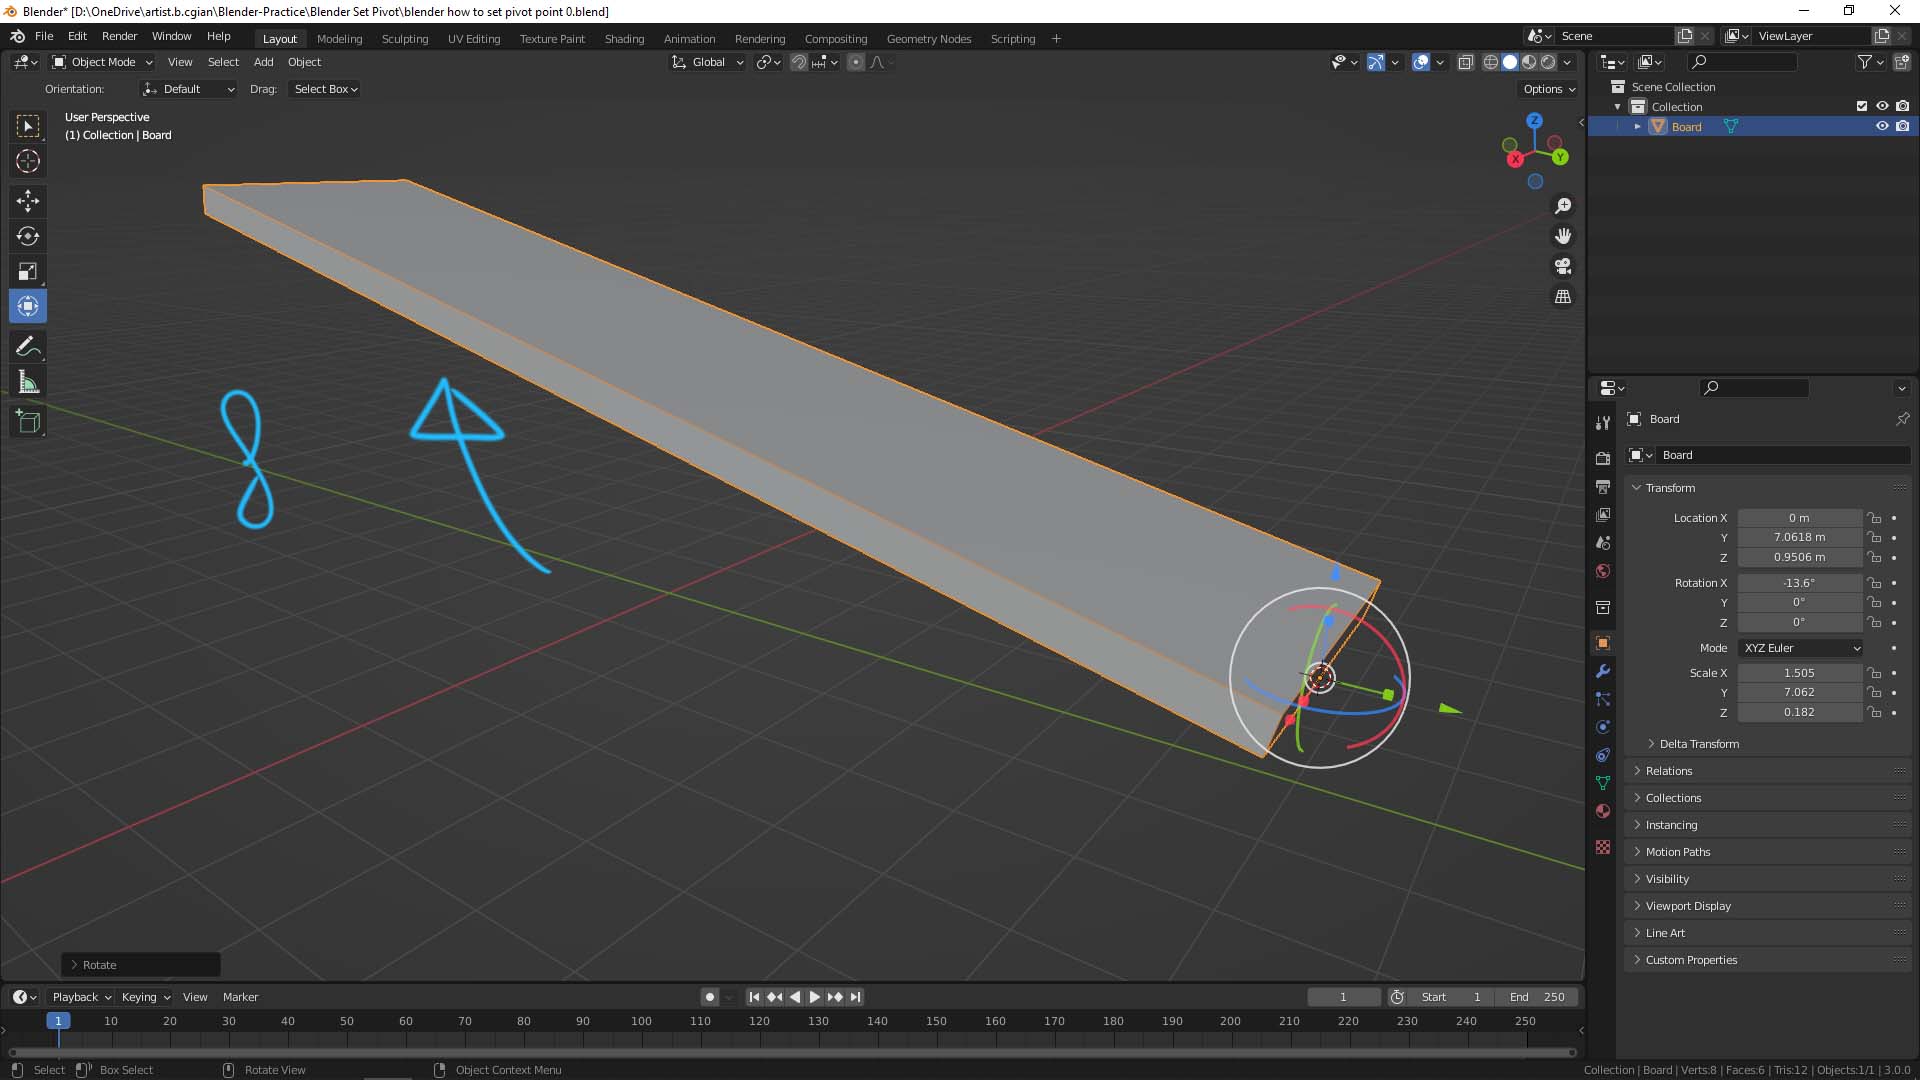
8. Then we can rotate, move, scale the 3D object according to origin, pivot point.
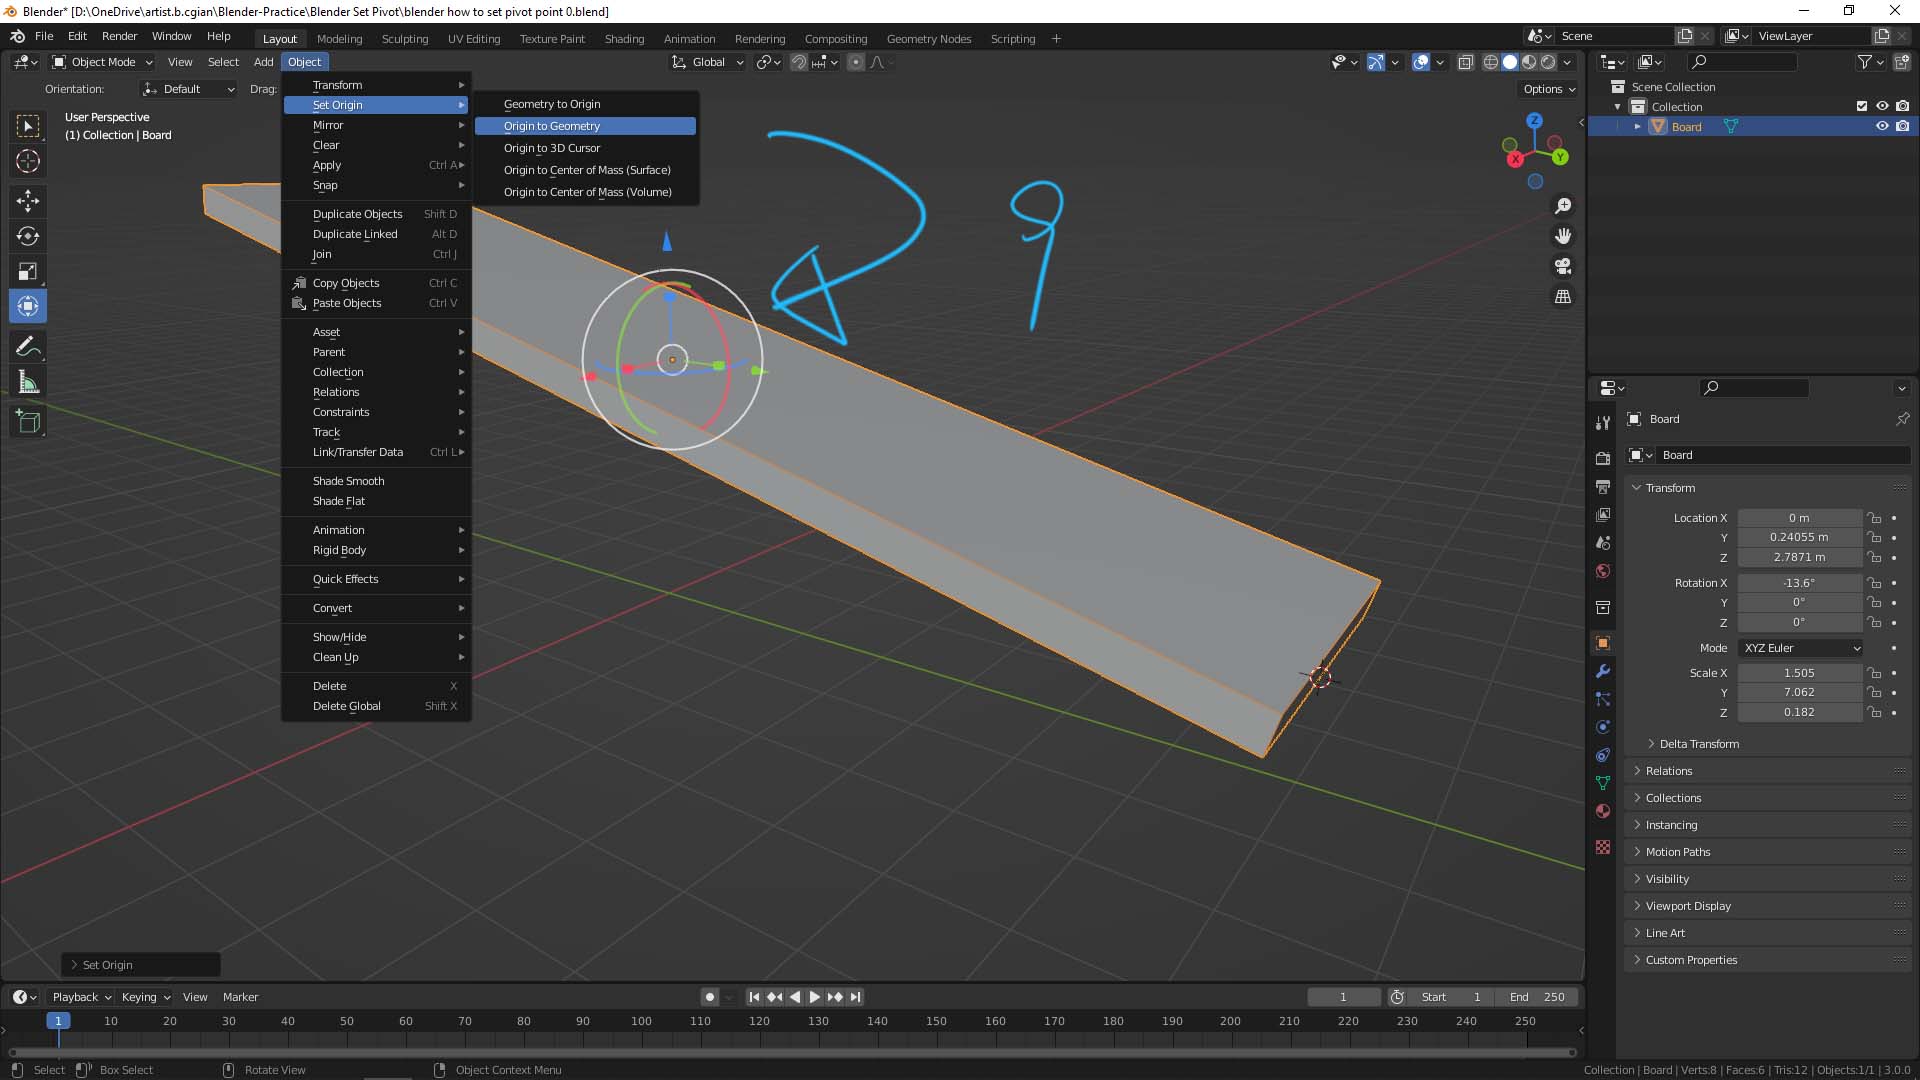
9. In case, after doing upper adjustment, we can set Origin back to center of object. If doing so, we can go to Object > Set Origin > Origin to Geometry.
Hope this helps. More Blender Tutorial, Tips and Tricks are available here.
Have fun with CGI, to make it simple.
#cgian #aritstB #b3d #blender
Continuous Reading:
How to set Origin in Blender
How to add decal to object in Blender
Blender Apply Transform in Location, Rotation & Scale
Blender How to move object, and set animation
Feel free to share with your friend.
by [email protected]
