Blender Basics – To make emission from an object, we can add Emission Node to material shader in Blender. Below steps in simply to show how to add Emission node in Shader Editor. And also show how to make glowing effects by using Bloom with Eevee, and by compositing with Cycles. Hope this helps. More Blender Tutorial, Tips and Tricks are available here.
How to make emission in Blender

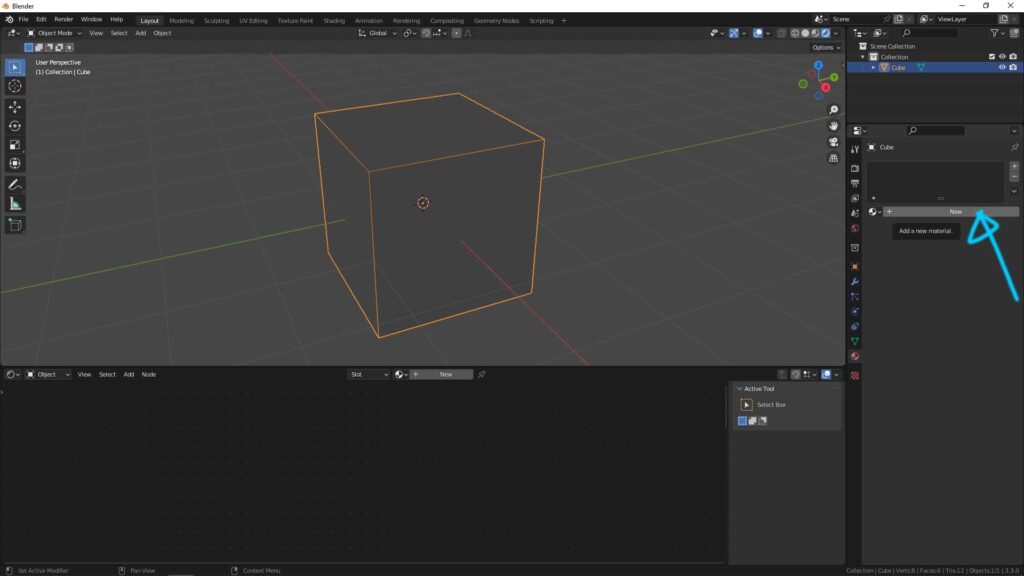
1. Select an object, go to panel on the right. In the Material Properties Tab, we can click new to add a new material.

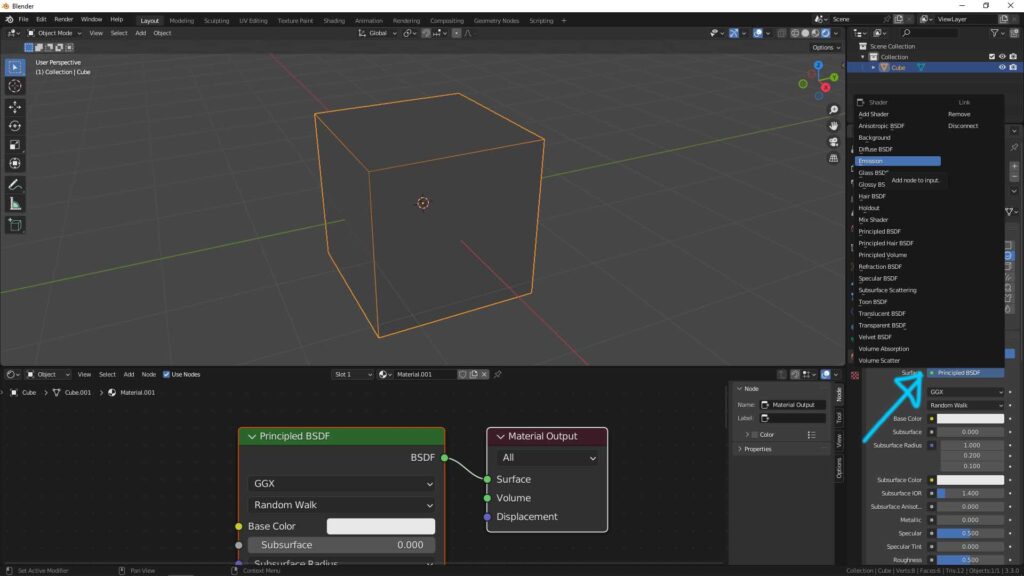
2. After adding material, the default shader is connected to Principled BSDF. We can click the Dot next to Surface, and select Emission Node. Or we can select the Principled BSDF in Shader Editor, and shortcut Shift + A to add and search “Emission”.

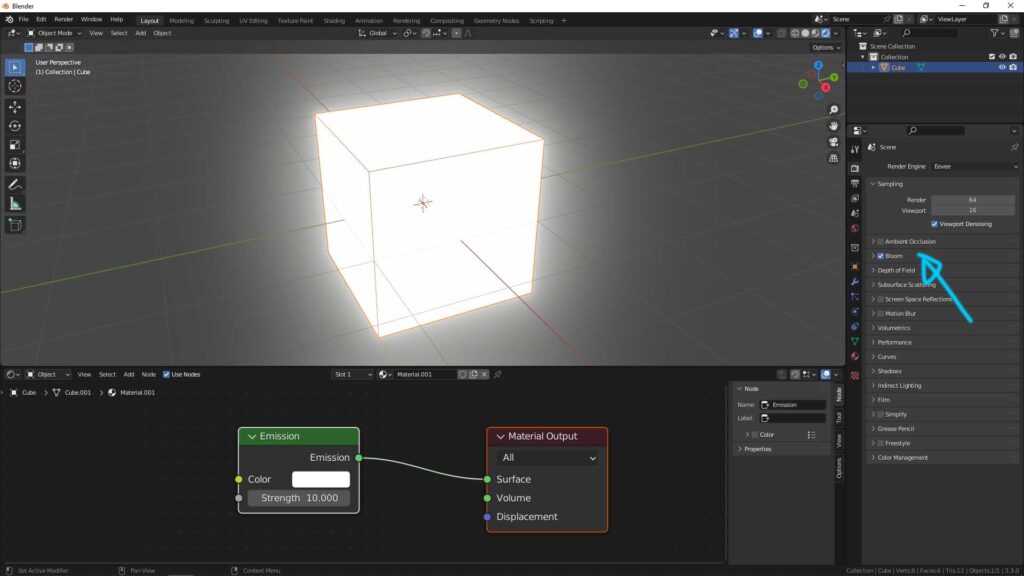
3. After adding the emission node, and connected to Surface in Material Output. The Object is already set to emit with light. We can adjust the Strength Value. In addition, if we want to get the glowing effect, we can activate “Bloom” with Eevee renderer, or by compositing with Cycles Renderer – watch video How to render wireframe in Blender with Material Shader Node.
Another video to show how we can using Emission node with glowing effects with Eevee and Cycles in Blender. Feel free to have a look.
Watch on YouTube
Hope this helps. More Blender Tutorial, Tips and Tricks are available here.
Have fun with CGI, to make it simple.
#cgian #aritstB #b3d #blender
Continues Reading :
How to add Blender Text with Glowing Effect
How to add light to an object in Blender
Blender Volumetric Lighting for Eevee and Cycles
Welcome to share with your friend.
by [email protected]
