
Environment Map is used for adding image into the whole scene in Blender. In other words, if we want to make environment by using single image (HDRI image) into 3D World, we can add environment map that is surrounding the 3D objects in the scene. We can use environment map for replacing the lights. Most of the case, if we want to make the realistic render, we can add realistic HDRI image into environment texture node. Below steps are showing how to add environment map in Blender. Hope this helps. More Blender Tutorial, Tips and Tricks are available here.
How to add environment map in Blender
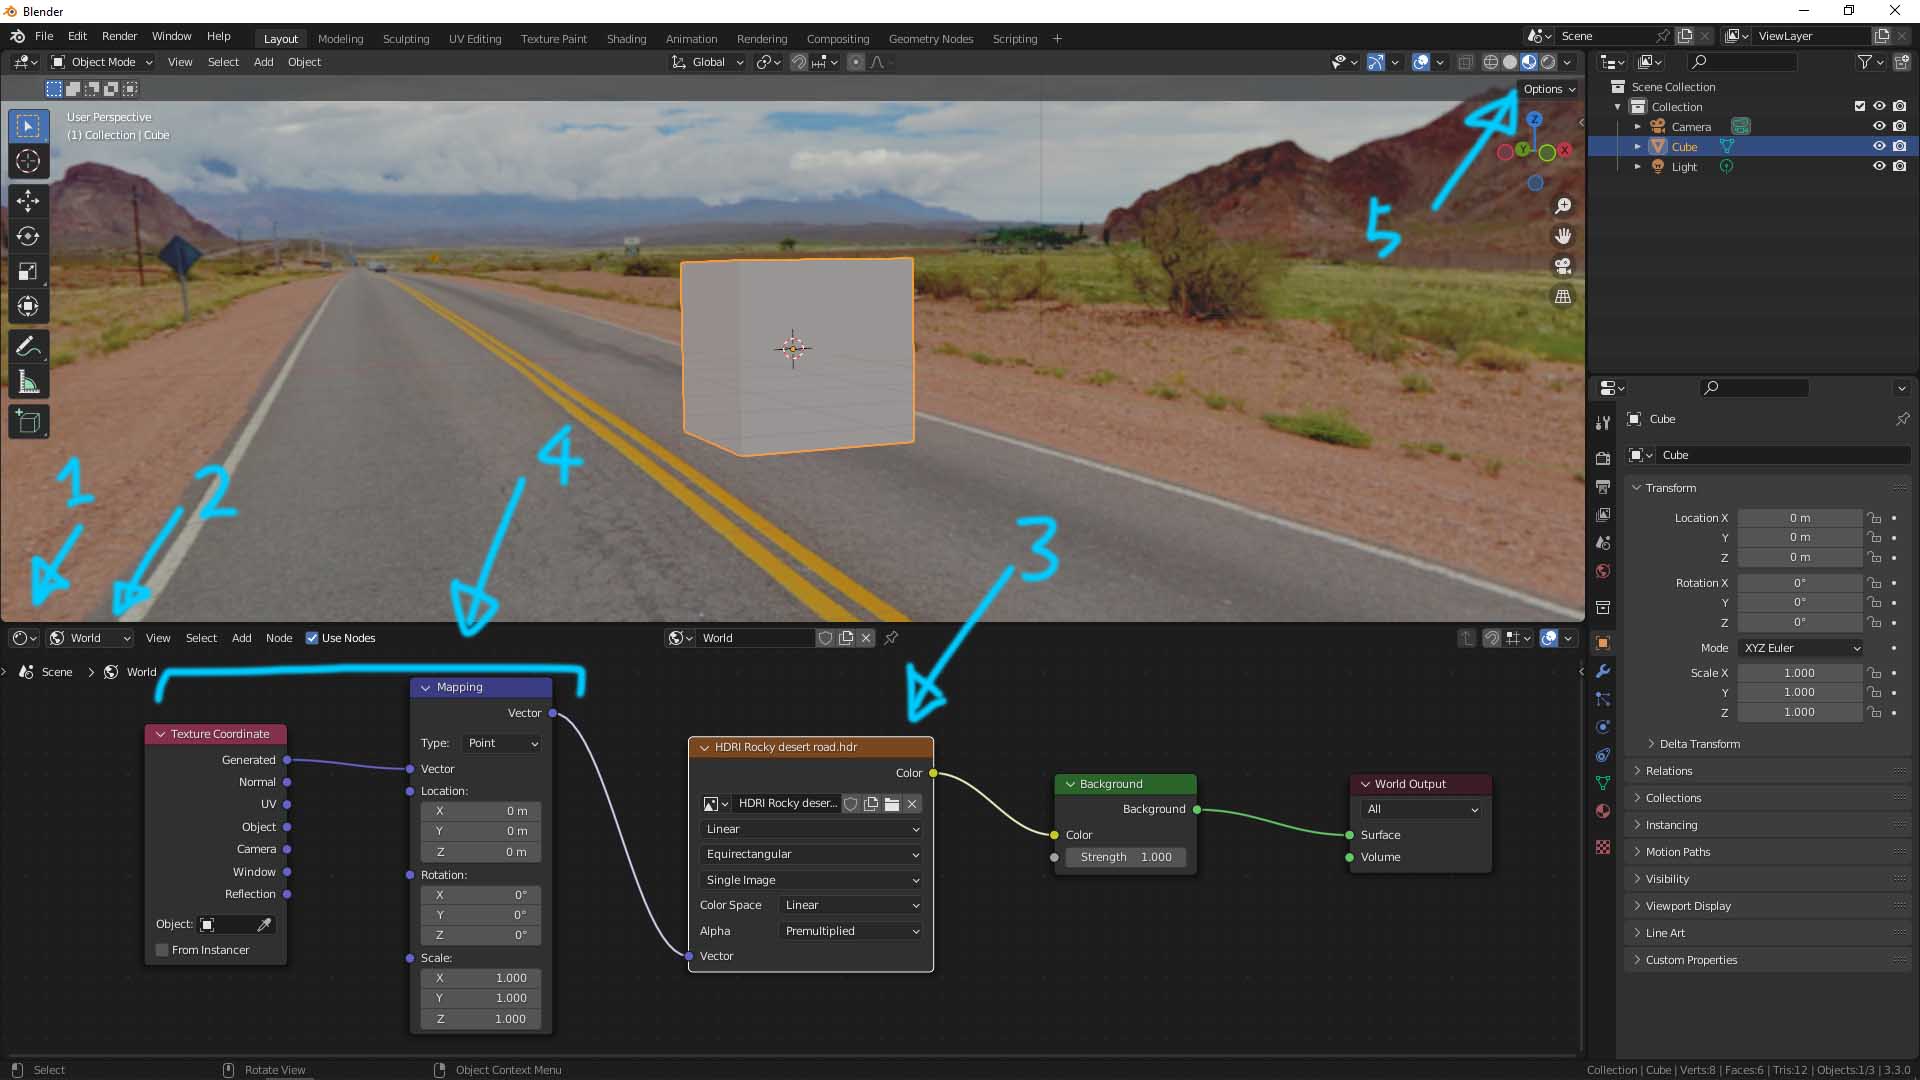
1. Switch to Shader Editor.
2. Switch to “Word”.
3. Add Image Texture Node, and click the Folder Icon to link an image, HDRI image is preferred.
4. Add Mapping Node and Texture Coordinate Node, which the 2 nodes are controlling the location, orientation of environment map.
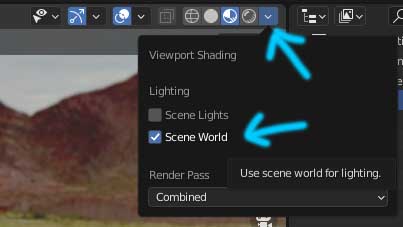
5. Switch to Material Preview, and check the box “Scene World”.
Video to show the steps, watch here, How to make Blender HDRI Render with Environment
Hope this helps. More Blender Tutorial, Tips and Tricks are available here.
Continues Reading :
Blender addon – Dynamic Sky
How to add light to an object in Blender
How to add textures in Blender
Welcome to share with your friend.
by [email protected]
