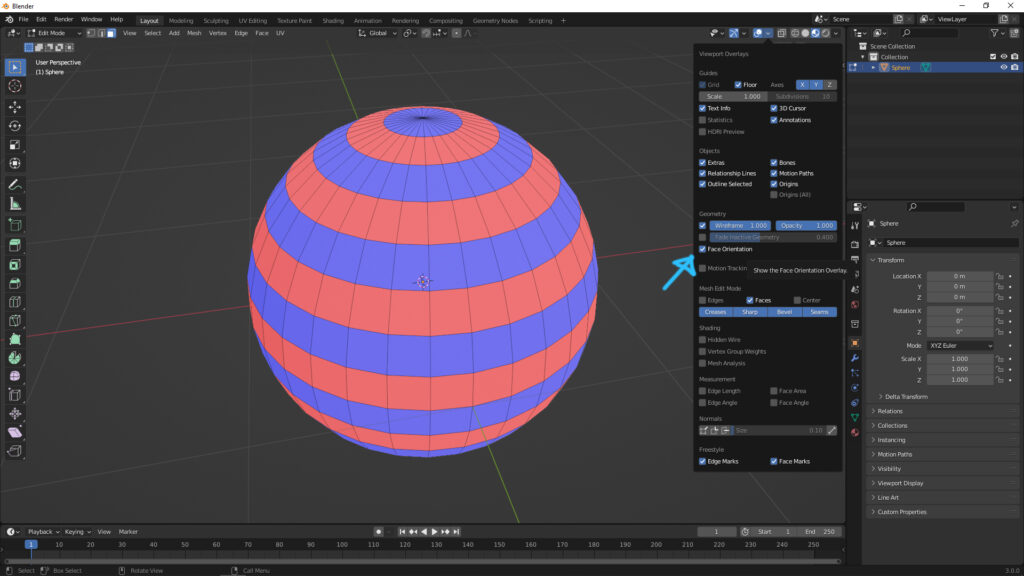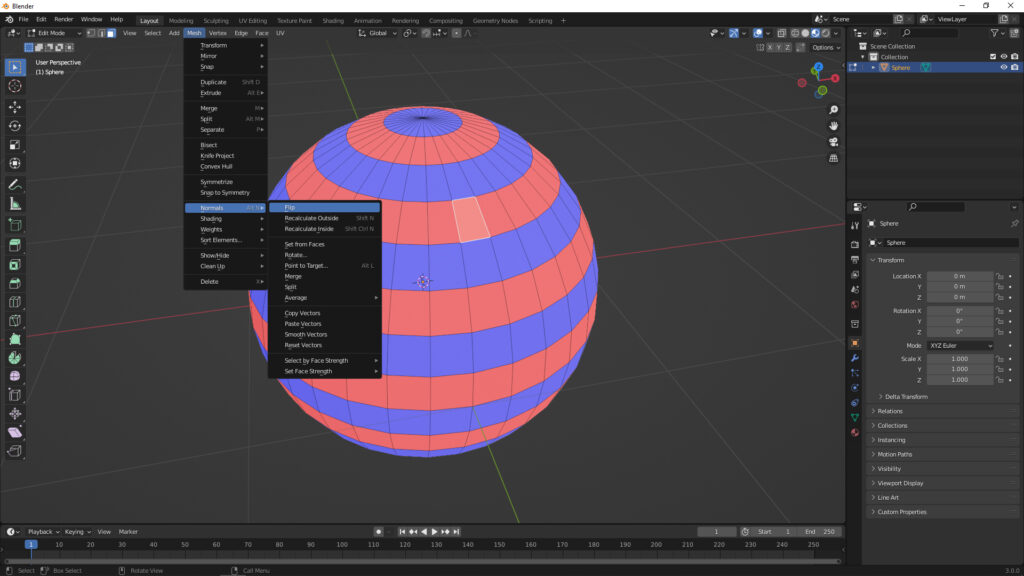
Blender Flip Normals Tutorial to show how to show face orientation and flip normals for 3D object. When we make a 3D object in Blender, we may find that the face orientation is not as our expectation. As upper screenshot, there are different colors (blue and red) on the object when showing the face orientation. To fix the wrong face orientation, we can follow the steps below to show the face orientation and flip normals in Blender.
How to show face orientation and flip normals in Blender
We can follow below steps to show the face orientation and then flip normal in Blender.
1. Select the object that you want check its normals or face orientation,
2. Go to edit mode,
3. Check the box Face orientation as upper screenshot shown. The different color of faces mean that face orientation different : Blue color is face forwards, and Red color is facing backwards.
4. To fix the face orientation, we can change the face orientation by using flips orientation.
5. Select faces that you want to change the face orientation.
6. Select Flip normals as below screenshot.

Here is the Tutorial on YouTube that visually shows how to view Face Orientation and Flip Normals, watch the video here,
Click here to subscribe this YouTube channel, more video will be shared with you. Let’s create with Blender together!
Feel free to watch more video on【YouTube Playlist】
More Blender Tutorial, Tips and Trick at cgian.com
#b3d #blender #cgian #blenderian
Continues Reading:
How to select back Vertices, Edges, Faces behind object in Blender
How to show Normals Direction and Face Orientation in Blender 4
Blender Geometry Nodes Tutorials and Examples
Blender triangulate faces with shortcut and triangulate for objects using modifier
Tips and Tricks
from cgian.com
Welcome to share by using below button.
