
To make VR content or 360 Photos for Facebook, we can render a 3D scene into a 360 Panorama image in Blender, and then convert this Panorama image to a 360 photo that can be uploaded to Facebook as a 360 Photo. Below is then steps how to make it. Hope this helps.
How to render 3D Panoramic Image in Blender and upload 360 Photo on Facebook
Firstly, we should have a scene that contains 3D objects inside an virtual environment or inside the indoor room settings like as this example. This is similar scene setting with other normal scene, but only the different setting is in the camera. If we want to render a 360 photos, that we can call it Panoramic Photo, we can set render image size and set the camera by these steps in Blender,
How to render 360 Photo in Blender
1. The 360 Photo dimensions or size is in ratio 2:1 (Width : Height) . To make the panoramic image, make sure that the rendered image size is 2:1. In Blender, go to Output Properties > Resolution > set X and Y to 2000 and 1000, or other 2:1 ratio.
2. Then select Camera, and go to Object Data Properties,
3. In Lens > Type , the default setting is Perspective, switch it to Panoramic,
4. In Panorama Type, Choose Equirectangular,
5. Then we can Render Image / Render Animation, that is the image in Panoramic view, make sure the output file format in JPG.
Here is the Video Tutorial to show How to Render 360 Panorama in Blender.
Convert panorama to 360 Photo for Facebook
After the rendering in Blender, go to Microsoft Windows,
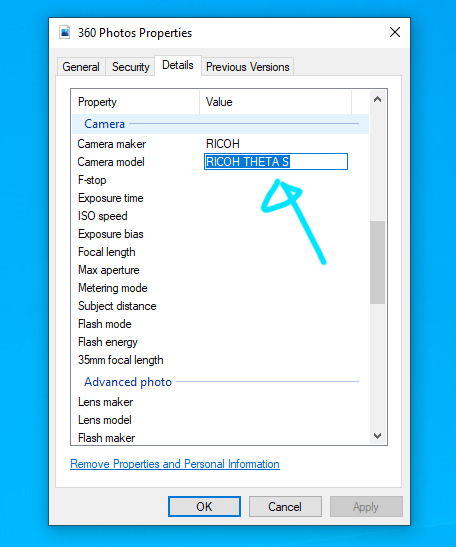
6. Select the rendered image in JPG file format, right click to select Properties,
7. Properties > Camera, set Camera to RICOH, and set Camera model to RICOH THETA S .
How to post 360 Photo on Facebook
To upload 360 Photos to Facebook, we can follow the steps,
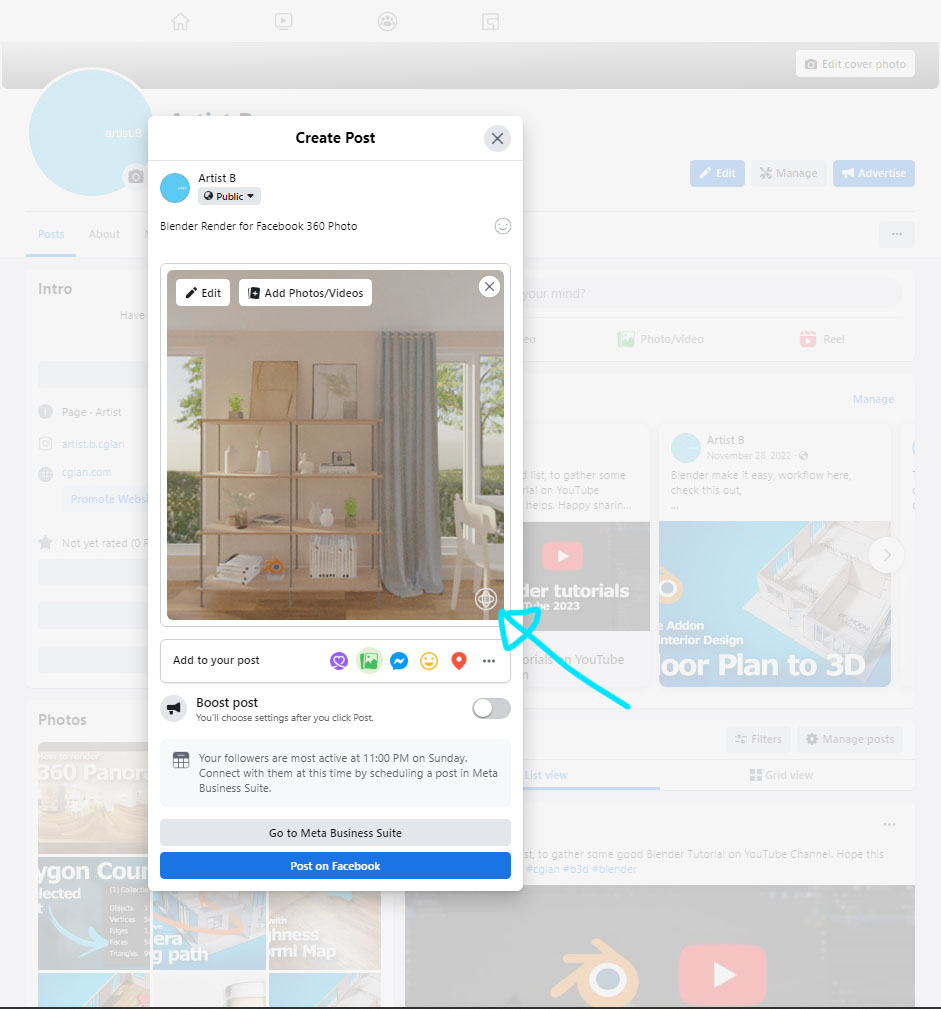
8. Open Facebook App in Android Device or iOS Device. I am using desktop version in the below screenshot for example.
9. Tap Photo/Video Icon in your newsfeed at the top of screen, and then select your 360 Photo, make sure that the 360 Photo Icon shown at bottom-right corner.
10. Tap Post to upload and share with your audience.
Here is the final result, the 360 Photo post on Facebook.
Hope this helps. More Blender Tutorial, Tips and Tricks are available here.
Have fun with CGI, to make it simple.
#cgian #aritstB #b3d #blender
Continues Reading :
Blender Architecture Addon Tutorial for 3D Floor Plan
Blender Add Camera and Move Camera Follow Path
How to Learn Blender
VR Space App for 3D Model and Render Showcase in Metaverse
Welcome to share with your friend.
by [email protected]
